前言
GIL:又称全局解释器锁。作用是限制多线程同时执行,保证同一时间内只有一个线程在执行。Python 由于 GIL 的存在,导致在多核 CPU 上,只能利用一个 CPU 的资源。
Python 自带的多线程在多核 CPU 上,只对于 IO 密集型计算产生正面效果;而当有至少有一个CPU密集型线程存在,那么多线程效率会由于GIL而大幅下降。
但是我们可以通过 ctypes 库引用 动态链接库 来实现真正的多线程。
本博文的代码在 Linux 版本的 Visual Studio Code 上测试的。
操作系统:Ubuntu 20.04.4 LTS
参考文档
深入理解Python中的GIL(全局解释器锁)
python实现真正的多线程
C++ 多线程
Using C++ on Linux in VSCode
Getting Started with Python in VS Code
C++ 线程的使用
配置 C/C++ 的环境
安装 Visual Studio Code 。
为 VSCode 安装 C++ 的扩展,你能在扩展处( Ctrl+Shift+X )搜索 ‘c++’ 来安装 C/C++ 的扩展。扩展为
确保 GCC 已经被安装。
1
2
3
4
5
6
# First, check to see whether GCC is already installed. gcc -v # If GCC isn't installed, run the following command from the terminal window. sudo apt-get update sudo apt-get install build-essential gdb
创建 Hello World
1
2
3
4
5
mkdir projects cd projects mkdir helloworld cd helloworld code .
进入到 VSCode 界面上后,在文件资源管理器的标题栏处,新建一个 helloword.cpp,粘贴下面代码,然后 Ctrl+S 保存文件
1 2 3 4 5 6 7 8 9 10 11 12 13 14 15 16 #include <iostream> #include <vector> #include <string> using namespace std;int main () vector<string> msg {"Hello" , "C++" , "World" , "from" , "VS Code" , "and the C++ extension!" }; for (const string& word : msg) { cout << word << " " ; } cout << endl; }
打开 helloworld.cpp 文件,按 F5 启动调试,选择 C++(GDB/LLDB)> C/C++: g++ 生成和调试活动文件。
运行完成后,你将要在命令行看到下面的输出
1 Hello C++ World from VS Code and the C++ extension!
C++ 多线程
C++11 之前,C++ 不包含对多线程应用程序的任何内置支持。相反,它完全依赖于操作系统来提供此功能。
本博文假设您使用的是 Linux 操作系统,我们将使用 POSIX Threads 或 Pthreads 提供的 API 编写多线程 C++ 程序。
可移植操作系统接口(英语:Portable Operating System Interface,缩写为POSIX)是 IEEE 为要在各种 UNIX 操作系统上运行软件,而定义 API 的一系列互相关联的标准的总称。
进入到 VSCode 中,在 VSCode 下面的终端运行下面的命令创建运行目录
1
2
3
4
mkdir C++多线程 cd C++多线程 mkdir 01实例 cd 01实例
01实例
新建一个 01实例.cpp 文件,粘贴下面代码,然后 Ctrl+S 保存文件
1 2 3 4 5 6 7 8 9 10 11 12 13 14 15 16 17 18 19 20 21 22 23 24 25 26 27 28 29 30 31 32 33 #include <iostream> #include <pthread.h> using namespace std;#define NUM_THREADS 5 void * say_hello (void * args) cout << "Hello World!" << endl; } int main () pthread_t tids[NUM_THREADS]; for (int i = 0 ; i < NUM_THREADS; ++i) { int ret = pthread_create (&tids[i], NULL , say_hello, NULL ); if (ret != 0 ) { cout << "pthread_create error: error_code=" << ret << endl; } } pthread_exit (NULL ); }
运行下面命令
1
2
g++ 01实例.cpp -lpthread -o 01实例 ./01实例
打印出下面内容,由于多线程的作用,输出并不是完全按照顺序的,可以发现的有的 Hello World! 的换行符还没打印就开始打印其他线程的 Hello World 了。
1
2
3
4
5
Hello World!Hello World!Hello World! Hello World! Hello World!
02实例 - 接收传入参数
运行下面的命令创建 02实例 目录
1
2
3
cd .. mkdir 02实例 cd 02实例/
新建一个 02实例.cpp 文件,粘贴下面代码,然后 Ctrl+S 保存文件
1 2 3 4 5 6 7 8 9 10 11 12 13 14 15 16 17 18 19 20 21 22 23 24 25 26 27 28 29 30 31 32 33 34 35 36 37 #include <iostream> #include <pthread.h> using namespace std;#define NUM_THREADS 5 void *PrintHello (void *threadid) int tid = *((int *)threadid); cout << "线程 ID, " << tid << endl; pthread_exit (NULL ); } int main () pthread_t threads[NUM_THREADS]; int indexes[NUM_THREADS]; int rc; int i; for (i=0 ; i < NUM_THREADS; i++) { cout << "main() : 创建线程," << i << endl; indexes[i] = i; rc = pthread_create (&threads[i], NULL , PrintHello, (void *)&(indexes[i])); if (rc) { cout << "Error:无法创建线程," << rc << endl; exit (-1 ); } } pthread_exit (NULL ); }
运行下面命令
1
2
g++ 02实例.cpp -lpthread -o 02实例 ./02实例
打印出下面内容,由于多线程的作用,发现有的线程还没创建,已经有线程运行完了。
1
2
3
4
5
6
7
8
9
10
main() : 创建线程,0 main() : 创建线程,1 线程 ID, 0 main() : 创建线程,2 main() : 创建线程,3 main() : 创建线程,4 线程 ID, 1 线程 ID, 2 线程 ID, 4 线程 ID, 3
03实例 - 接收结构体参数
运行下面的命令创建 03实例 目录
1
2
3
cd .. mkdir 03实例 cd 03实例/
新建一个 03实例.cpp 文件,粘贴下面代码,然后 Ctrl+S 保存文件
1 2 3 4 5 6 7 8 9 10 11 12 13 14 15 16 17 18 19 20 21 22 23 24 25 26 27 28 29 30 31 32 33 34 35 36 37 38 39 40 41 42 43 44 45 46 #include <iostream> #include <pthread.h> using namespace std;#define NUM_THREADS 5 struct thread_data { int thread_id; char *message; }; void *PrintHello (void *threadarg) struct thread_data *my_data; my_data = (struct thread_data *) threadarg; cout << "Thread ID : " << my_data->thread_id; cout << " Message : " << my_data->message << endl; pthread_exit (NULL ); } int main () pthread_t threads[NUM_THREADS]; struct thread_data td[NUM_THREADS]; int rc; int i; for (i=0 ; i < NUM_THREADS; i++) { cout << "main() : creating thread, " << i << endl; td[i].thread_id = i; td[i].message = "This is message" ; rc = pthread_create (&threads[i], NULL , PrintHello, (void *)&td[i]); if (rc) { cout << "Error:unable to create thread," << rc << endl; exit (-1 ); } } pthread_exit (NULL ); }
运行下面命令
1
2
g++ 03实例.cpp -lpthread -o 03实例 ./03实例
打印出下面内容,由于多线程的作用,发现有的线程还没创建,已经有线程运行完了。
1
2
3
4
5
6
7
8
9
10
main() : creating thread, 0 main() : creating thread, 1 main() : creating thread, 2 Thread ID : 0 Message : This is message main() : creating thread, 3 Thread ID : 2 Message : This is message main() : creating thread, 4 Thread ID : 3 Message : This is message Thread ID : 1 Message : This is message Thread ID : 4 Message : This is message
04实例 - pthread_join
运行下面的命令创建 04实例 目录
1
2
3
cd .. mkdir 04实例 cd 04实例/
新建一个 04实例.cpp 文件,粘贴下面代码,然后 Ctrl+S 保存文件
1 2 3 4 5 6 7 8 9 10 11 12 13 14 15 16 17 18 19 20 21 22 23 24 25 26 27 28 29 30 31 32 33 34 35 36 37 38 39 40 41 42 43 44 45 46 47 48 49 50 51 52 53 54 55 56 57 58 59 #include <iostream> #include <pthread.h> #include <unistd.h> using namespace std;#define NUM_THREADS 5 void *wait (void *t) int i; long tid; tid = (long )t; sleep (1 ); cout << "Sleeping in thread " << endl; cout << "Thread with id : " << tid << " ...exiting " << endl; pthread_exit (NULL ); } int main () int rc; int i; pthread_t threads[NUM_THREADS]; pthread_attr_t attr; void *status; pthread_attr_init (&attr); pthread_attr_setdetachstate (&attr, PTHREAD_CREATE_JOINABLE); for (i=0 ; i < NUM_THREADS; i++) { cout << "main() : creating thread, " << i << endl; rc = pthread_create (&threads[i], NULL , wait, (void *)i); if (rc) { cout << "Error:unable to create thread," << rc << endl; exit (-1 ); } } pthread_attr_destroy (&attr); for (i=0 ; i < NUM_THREADS; i++){ rc = pthread_join (threads[i], &status); if (rc) { cout << "Error:unable to join," << rc << endl; exit (-1 ); } cout << "Main: completed thread id :" << i; cout << " exiting with status :" << status << endl; } cout << "Main: program exiting." << endl; pthread_exit (NULL ); }
运行下面命令
1
2
g++ 04实例.cpp -lpthread -o 04实例 ./04实例
pthread_join() 子例程阻碍调用例程,直到指定的 threadid 线程终止为止。
打印出下面内容,由于 pthread_join() 函数的作用,线程完成是有顺序的。
1
2
3
4
5
6
7
8
9
10
11
12
13
14
15
16
17
18
19
20
21
main() : creating thread, 0 main() : creating thread, 1 main() : creating thread, 2 main() : creating thread, 3 main() : creating thread, 4 Sleeping in thread Sleeping in thread Thread with id : 1 ...exiting Thread with id : 0 ...exiting Main: completed thread id :0 exiting with status :0 Main: completed thread id :1 exiting with status :0 Sleeping in thread Thread with id : 2 ...exiting Main: completed thread id :2 exiting with status :0 Sleeping in thread Thread with id : 4 ...exiting Sleeping in thread Thread with id : 3 ...exiting Main: completed thread id :3 exiting with status :0 Main: completed thread id :4 exiting with status :0 Main: program exiting.
配置 Python 的环境
安装
Requires :
VSCode(前面已完成)
VSCode Python extension
Python 3
在 VSCode 中,为 VSCode 安装 Python 的扩展,你能在扩展处( Ctrl+Shift+X )搜索 ‘python’ 来安装 Python 的扩展。扩展为
Linux 已经内建了 Python 3,如果你需要安装其他第三方库,你需要用 get-pip.py 安装 pip。
Download the script, from https://bootstrap.pypa.io/get-pip.py .
Open a terminal/command prompt, cd to the folder containing the get-pip.py file and run:
验证 Python 的安装
创建运行目录
1
2
3
mkdir hello cd hello code .
选择一个 Python 解释器
在 VSCode 中,你可以通过按 Ctrl+Shift+P 快捷键,然后输入 Python: Select Interpreter 命令选择解释器。
创建一个 Hello World Python 脚本
从文件资源管理器上,点击 hello 目录上的 New File 按钮,新建一个 hello.py 文件,写入下面的代码,保存文件( Ctrl+S )
1
2
msg = "hello World" print (msg)
你可以通过点击右上角的 Run Python File in Terminal 按钮来运行 hello.py 脚本
安装和使用 packages
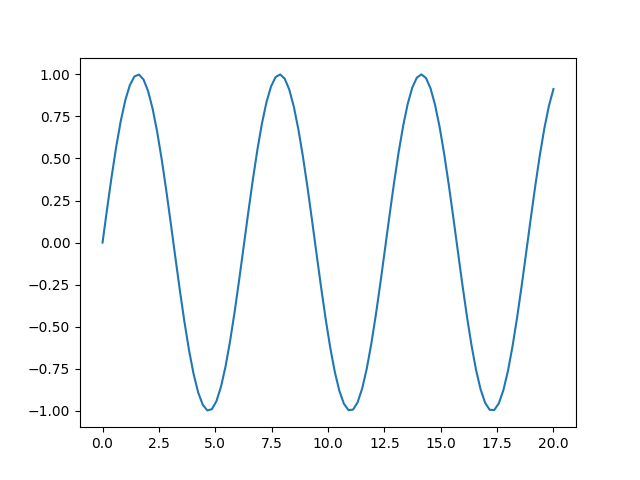
你能使用 matplotlib 和 numpy 第三方库画图。但是它们不是内建在 Python 中的标准库,你需要额外的安装它们。
新建一个 standardplot.py 文件,粘贴下面的代码
1
2
3
4
5
6
import matplotlib.pyplot as pltimport numpy as npx = np.linspace(0 , 20 , 100 ) plt.plot(x, np.sin(x)) plt.show()
你应该避免在全局解释器中安装 packages,应该使用 virtual environment 去包含全局解释器的副本,这样你能够将 packages 安装在这个副本中,能构避免不同版本的 packages 之间的冲突。
创建和激活一个虚拟环境
1
2
python3 -m venv .venv source .venv/bin/activate
按 Ctrl+Shift+P ,输入 Python: Select Interpreter 命令,选择你的新环境
安装 the packages
1
2
3
# ubuntu python3 -m pip install --upgrade pip python3 -m pip install matplotlib
运行 standardplot.py 脚本
一旦你完成了,请在命令窗口输入 deactivate deactivate 虚拟环境。
Python 实现真正的多线程
1
2
mkdir python实现真正的多线程 cd python实现真正的多线程
新建一个 foo.c 文件,粘贴下面的代码到文件中,保存文件( Ctrl+S )
1 2 3 4 5 6 7 8 9 10 11 12 13 14 15 16 17 18 19 20 #include <stdio.h> #include <pthread.h> void * myThread (void *arg) { while (1 ); } void createThread (void ) { int err; pthread_t tid; err = pthread_create(&tid, NULL , myThread, NULL ); if (err != 0 ) { printf ("create thread failed!\n" ); return ; } return ; }
编译成动态链接库
1 gcc -fPIC -shared -o libfoo.so foo.c
新建一个 ctypes_test.py 文件,粘贴下面的代码到文件中,保存文件( Ctrl+S )
1
2
3
4
5
6
7
8
9
10
11
12
13
14
from ctypes import *import timelib = CDLL("./libfoo.so" , RTLD_GLOBAL) create_thread = lib.createThread if __name__ == '__main__' : create_thread() create_thread() create_thread() create_thread() while True : print ("I am in main thread!" ) time.sleep(2 )
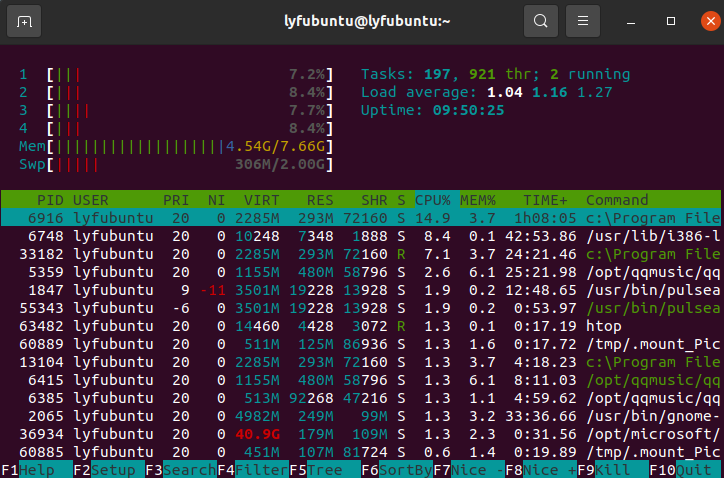
打开一个终端(运行 Python 脚本前)
1
2
3
4
# 安装 htop 命令 sudo apt-get install htop htop
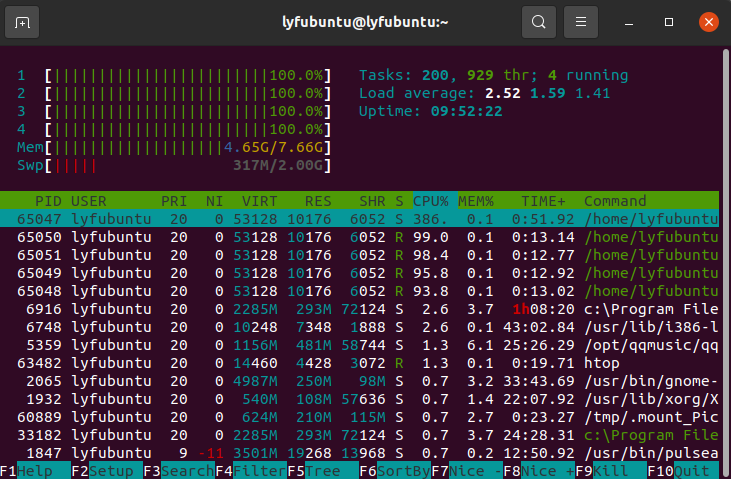
运行 ctypes_test.py 脚本
可以发现 CPU 电脑上的四个核都被利用了,实现了 Python 真正的多线程。
结语
第八篇博文写完,开心!!!!
今天,也是充满希望的一天。


 wechat
 alipay