
00090-FastAPI 学习笔记-windows10
前言
用于学习 FastAPI,FastAPI 框架,高性能,易于学习,高效编码,生产可用。
FastAPI 是一个用于构建 API 的现代、快速(高性能)的 web 框架,使用 Python 3.6+ 并基于标准的 Python 类型提示。
源教程地址: https://fastapi.tiangolo.com/zh/ .
项目仓库: https://github.com/LuYF-Lemon-love/simple-FastAPI .
操作系统:Windows 10 专业版
参考文档
环境
1 | git clone git@github.com:LuYF-Lemon-love/simple-FastAPI.git |
示例
- 创建一个
main.py文件并写入以下内容:
1 | from typing import Union |
或者使用 async def...
如果你的代码里会出现 async / await,请使用 async def:
1 | from typing import Union |
- 通过以下命令运行服务器:
1 | uvicorn main:app --reload |
关于 uvicorn main:app --reload 命令......
uvicorn main:app 命令含义如下:
main:main.py文件(一个 Python “模块”)。app:在main.py文件中通过app = FastAPI()创建的对象。--reload:让服务器在更新代码后重新启动。仅在开发时使用该选项。
- 使用浏览器访问 http://127.0.0.1:8000/items/5?q=somequery 。你将会看到如下 JSON 响应:
1 | {"item_id": 5, "q": "somequery"} |
你已经创建了一个具有以下功能的 API:
- 通过 路径
/和/items/{item_id}接受 HTTP 请求。- 以上 路径 都接受
GET操作(也被称为 HTTP 方法)。/items/{item_id}路径 有一个 路径参数item_id并且应该为int类型。/items/{item_id}路径 有一个可选的str类型的 查询参数q。
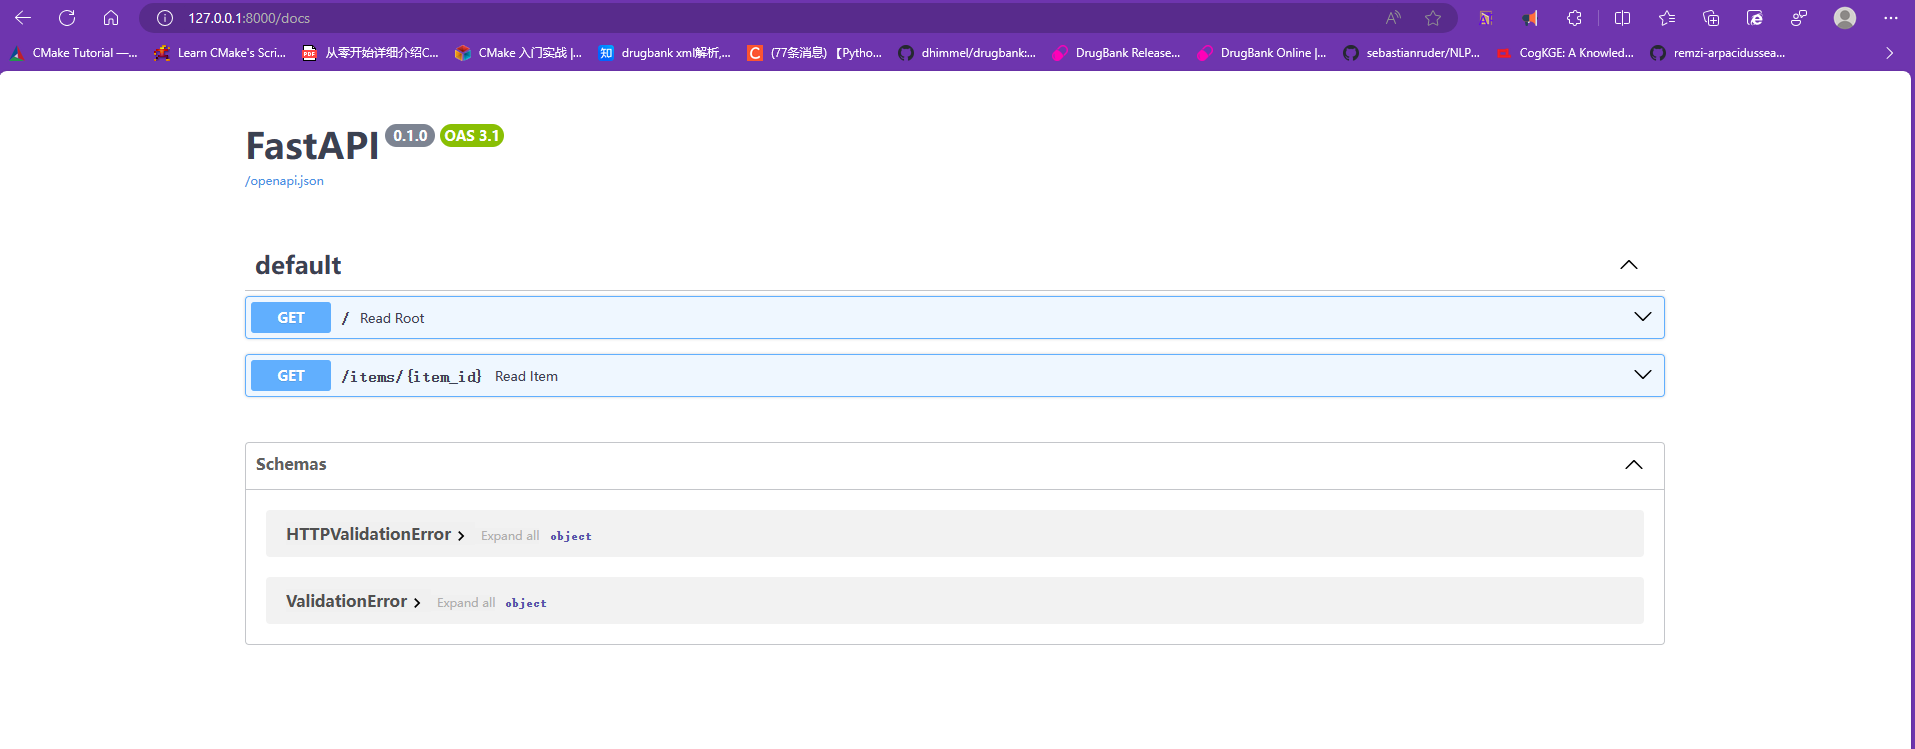
- 现在访问 http://127.0.0.1:8000/docs 。你会看到自动生成的交互式 API 文档(由 Swagger UI生成):
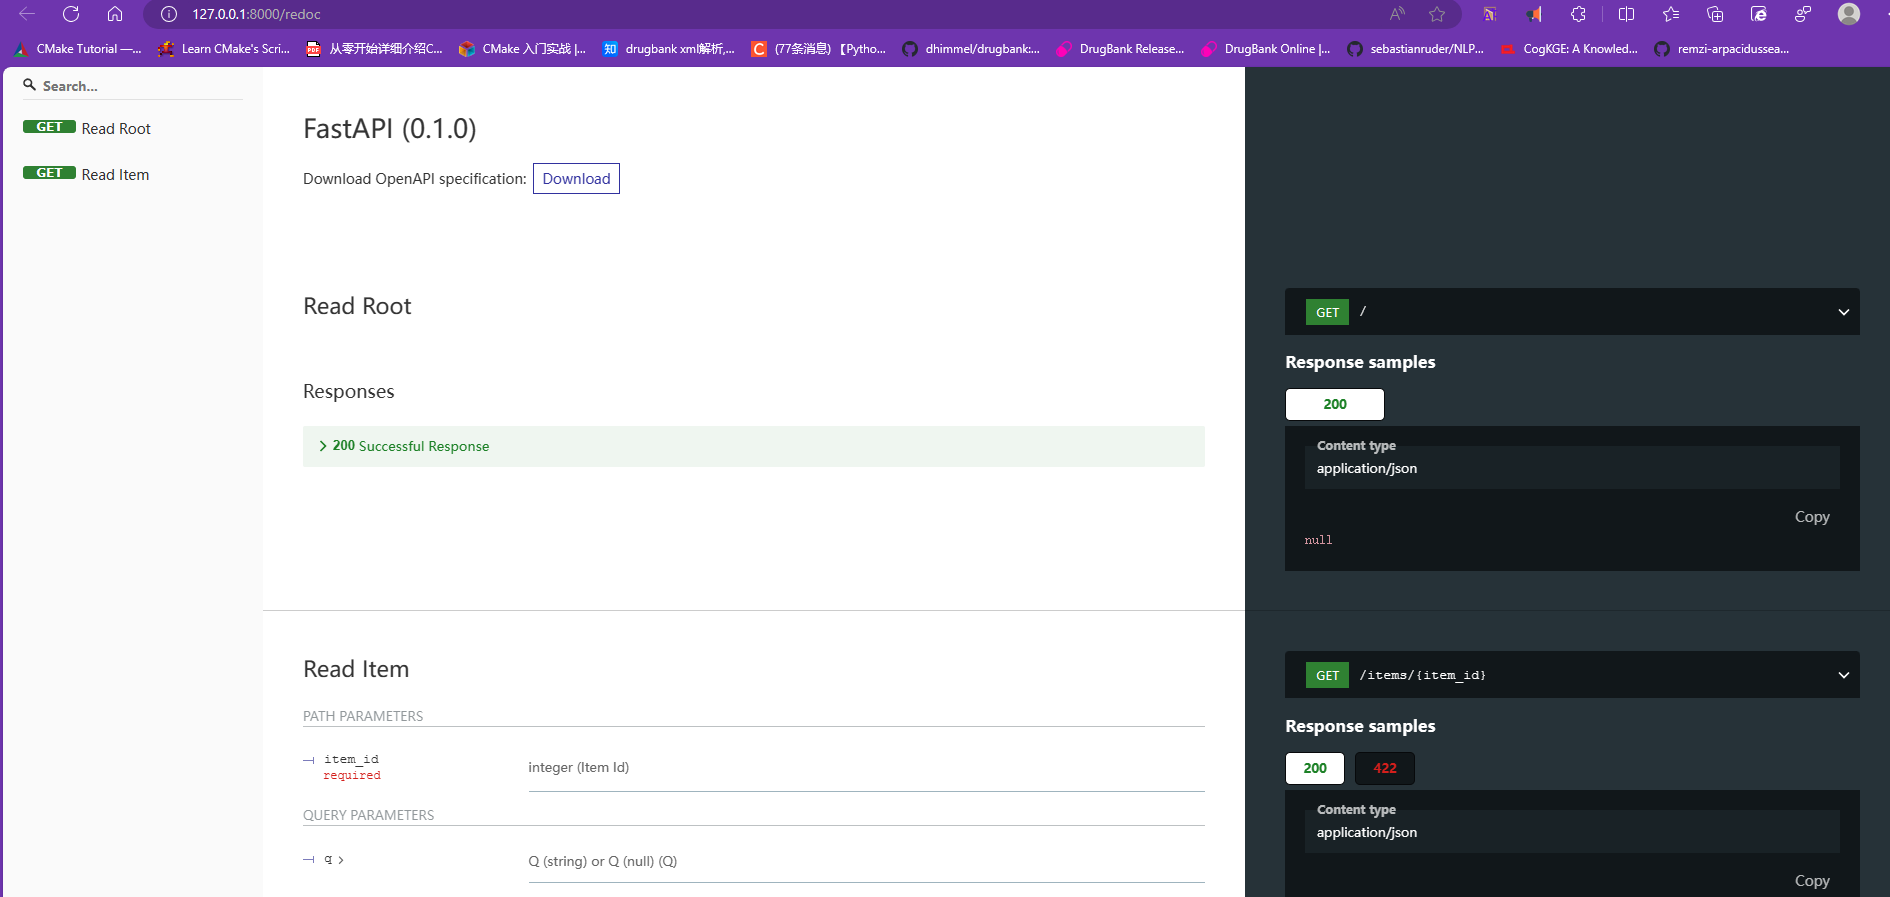
- 访问 http://127.0.0.1:8000/redoc 。你会看到另一个自动生成的文档(由 ReDoc 生成):
示例升级
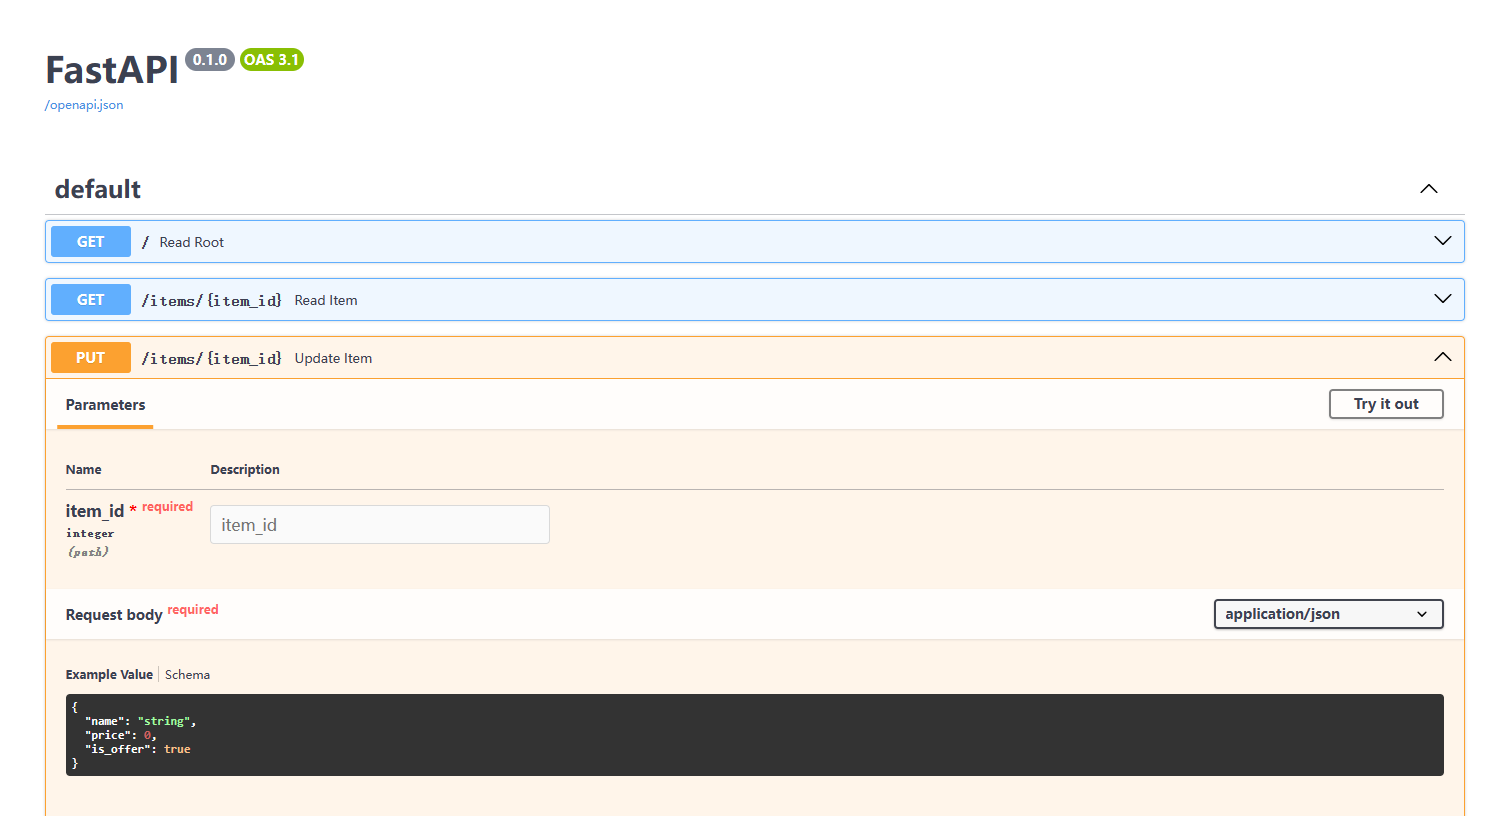
- 现在修改
main.py文件来从PUT请求中接收请求体。我们借助 Pydantic 来使用标准的 Python 类型声明请求体。
1 | from typing import Union |
服务器将会自动重载(因为在上面的步骤中你向 uvicorn 命令添加了 --reload 选项)。
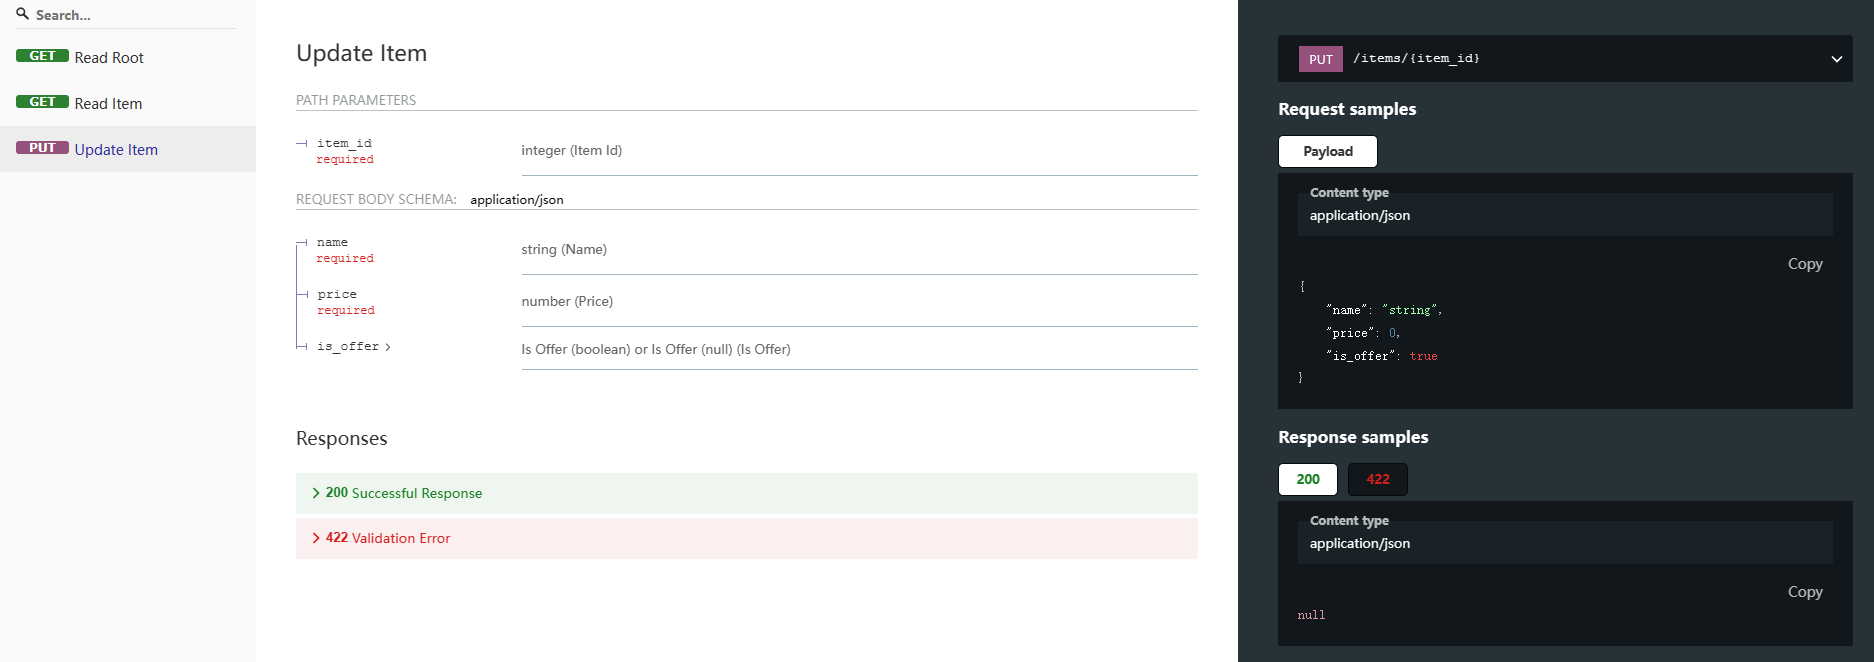
- 访问 http://127.0.0.1:8000/docs 。交互式 API 文档将会自动更新,并加入新的请求体:
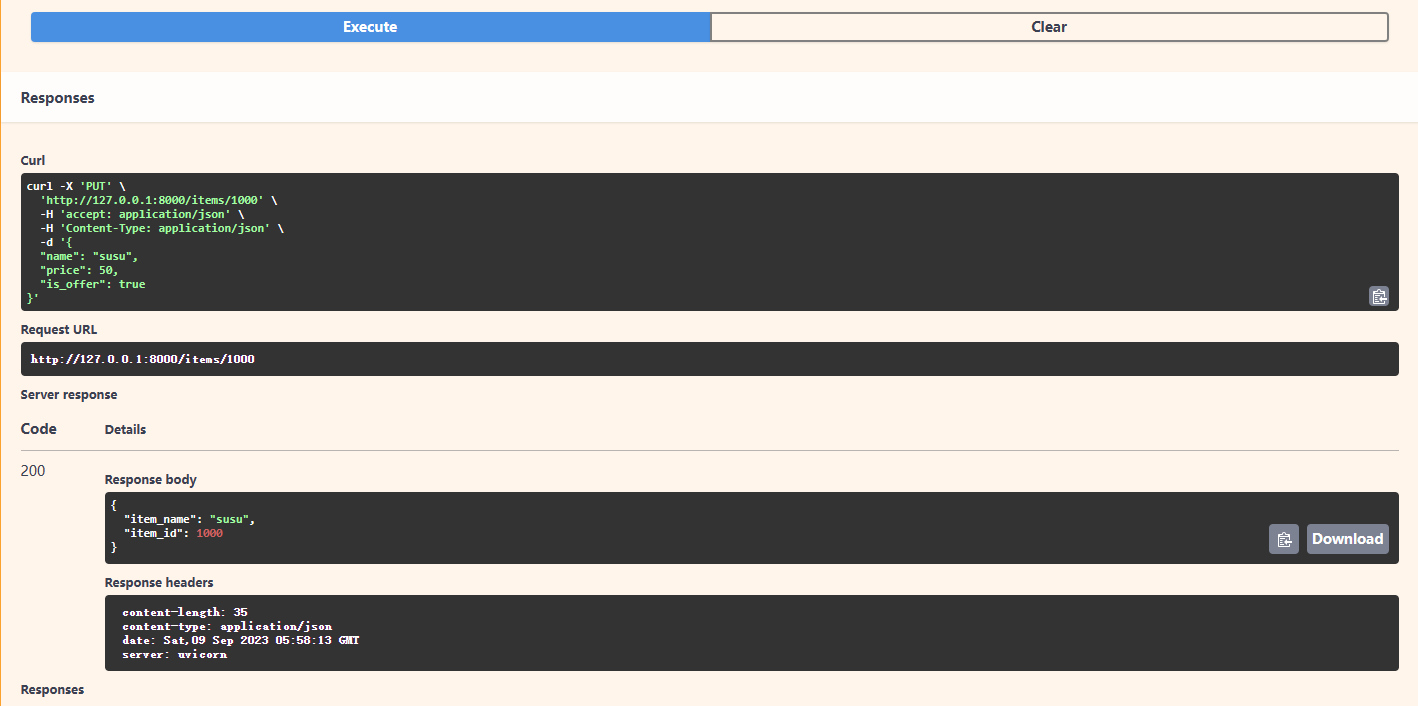
- 点击「Try it out」按钮,之后你可以填写参数并直接调用 API:
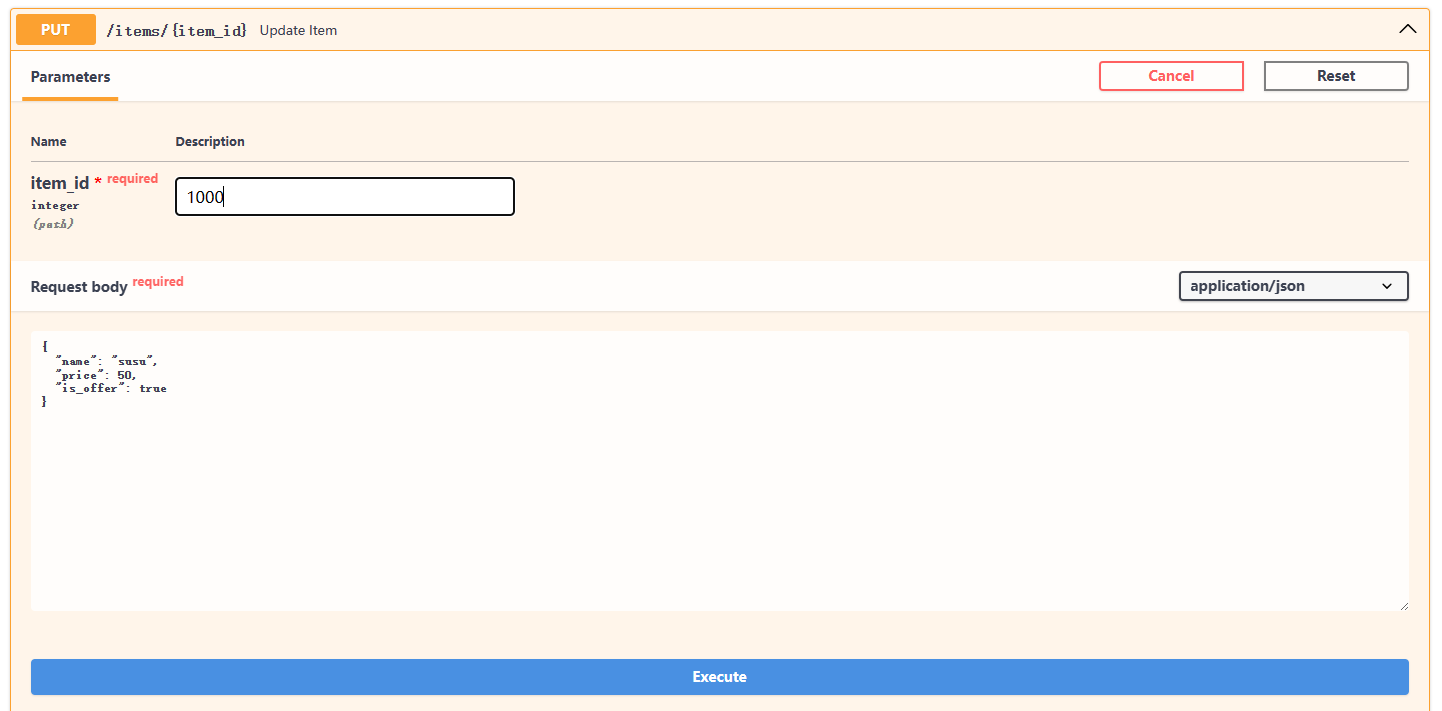
- 然后点击「Execute」按钮,用户界面将会和 API 进行通信,发送参数,获取结果并在屏幕上展示:
- 访问 http://127.0.0.1:8000/redoc 。可选文档同样会体现新加入的请求参数和请求体:
总结
总的来说,你就像声明函数的参数类型一样只声明了一次请求参数、请求体等的类型。
你使用了标准的现代 Python 类型来完成声明。
你不需要去学习新的语法、了解特定库的方法或类,等等。
只需要使用标准的 Python 3.6 及更高版本。
深入学习
结语
第九十篇博文写完,开心!!!!
今天,也是充满希望的一天。
本博客所有文章除特别声明外,均采用 CC BY-NC-SA 4.0 许可协议。转载请注明来自 LuYF-Lemon-love の Blog!
 wechat
 alipay