+ \begin{itemize} + \item The individual entries are indicated with a black dot, a so-called bullet. + \item The text in the entries may be of any length. + \end{itemize}
\begin{itemize} \item The individual entries are indicated with a black dot, a so-called bullet. \item The text in the entries may be of any length. \end{itemize}
+ \begin{enumerate} + \item This is the first entry in our list. + \item The list numbers increase with each entry we add. + \end{enumerate}
\begin{itemize} \item The individual entries are indicated with a black dot, a so-called bullet. \item The text in the entries may be of any length. \end{itemize}
\begin{enumerate} \item This is the first entry in our list. \item The list numbers increase with each entry we add. \end{enumerate}
+ In physics, the mass-energy equivalence is stated + by the equation $E=mc^2$, discovered in 1905 by Albert Einstein.
\begin{itemize} \item The individual entries are indicated with a black dot, a so-called bullet. \item The text in the entries may be of any length. \end{itemize}
\begin{enumerate} \item This is the first entry in our list. \item The list numbers increase with each entry we add. \end{enumerate}
In physics, the mass-energy equivalence is stated by the equation $E=mc^2$, discovered in 1905 by Albert Einstein.
+ \begin{math} + E=mc^2 + \end{math} is typeset in a paragraph using inline math mode---as is $E=mc^2$, and so too is \(E=mc^2\).
\begin{itemize} \item The individual entries are indicated with a black dot, a so-called bullet. \item The text in the entries may be of any length. \end{itemize}
\begin{enumerate} \item This is the first entry in our list. \item The list numbers increase with each entry we add. \end{enumerate}
In physics, the mass-energy equivalence is stated by the equation $E=mc^2$, discovered in 1905 by Albert Einstein.
\begin{math} E=mc^2 \end{math} is typeset in a paragraph using inline math mode---as is $E=mc^2$, and so too is \(E=mc^2\).
+ The mass-energy equivalence is described by the famous equation + \[ E=mc^2 \] discovered in 1905 by Albert Einstein.
+ In natural units ($c = 1$), the formula expresses the identity + \begin{equation} + E=m + \end{equation}
\begin{itemize} \item The individual entries are indicated with a black dot, a so-called bullet. \item The text in the entries may be of any length. \end{itemize}
\begin{enumerate} \item This is the first entry in our list. \item The list numbers increase with each entry we add. \end{enumerate}
In physics, the mass-energy equivalence is stated by the equation $E=mc^2$, discovered in 1905 by Albert Einstein.
\begin{math} E=mc^2 \end{math} is typeset in a paragraph using inline math mode---as is $E=mc^2$, and so too is \(E=mc^2\).
The mass-energy equivalence is described by the famous equation \[ E=mc^2 \] discovered in 1905 by Albert Einstein.
In natural units ($c = 1$), the formula expresses the identity \begin{equation} E=m \end{equation}
+ Subscripts in math mode are written as $a_b$ and superscripts are written as $a^b$. These can be combined and nested to write expressions such as
+ \[ T^{i_1 i_2 \dots i_p}_{j_1 j_2 \dots j_q} = T(x^{i_1},\dots,x^{i_p},e_{j_1},\dots,e_{j_q}) \] + We write integrals using $\int$ and fractions using $\frac{a}{b}$. Limits are placed on integrals using superscripts and subscripts:
+ \[ \int_0^1 \frac{dx}{e^x} = \frac{e-1}{e} \]
+ Lower case Greek letters are written as $\omega$ $\delta$ etc. while upper case Greek letters are written as $\Omega$ $\Delta$.
+ Mathematical operators are prefixed with a backslash as $\sin(\beta)$, $\cos(\alpha)$, $\log(x)$ etc.
\begin{itemize} \item The individual entries are indicated with a black dot, a so-called bullet. \item The text in the entries may be of any length. \end{itemize}
\begin{enumerate} \item This is the first entry in our list. \item The list numbers increase with each entry we add. \end{enumerate}
In physics, the mass-energy equivalence is stated by the equation $E=mc^2$, discovered in 1905 by Albert Einstein.
\begin{math} E=mc^2 \end{math} is typeset in a paragraph using inline math mode---as is $E=mc^2$, and so too is \(E=mc^2\).
The mass-energy equivalence is described by the famous equation \[ E=mc^2 \] discovered in 1905 by Albert Einstein.
In natural units ($c = 1$), the formula expresses the identity \begin{equation} E=m \end{equation}
Subscripts in math mode are written as $a_b$ and superscripts are written as $a^b$. These can be combined and nested to write expressions such as
\[ T^{i_1 i_2 \dots i_p}_{j_1 j_2 \dots j_q} = T(x^{i_1},\dots,x^{i_p},e_{j_1},\dots,e_{j_q}) \] We write integrals using $\int$ and fractions using $\frac{a}{b}$. Limits are placed on integrals using superscripts and subscripts:
\[ \int_0^1 \frac{dx}{e^x} = \frac{e-1}{e} \]
Lower case Greek letters are written as $\omega$ $\delta$ etc. while upper case Greek letters are written as $\Omega$ $\Delta$.
Mathematical operators are prefixed with a backslash as $\sin(\beta)$, $\cos(\alpha)$, $\log(x)$ etc.
+ \section{First example}
+ The well-known Pythagorean theorem \(x^2 + y^2 = z^2\) was proved to be invalid for other exponents, meaning the next equation has no integer solutions for \(n>2\):
+ \[ x^n + y^n = z^n \]
+ \section{Second example}
+ This is a simple math expression \(\sqrt{x^2+1}\) inside text. + And this is also the same: + \begin{math} + \sqrt{x^2+1} + \end{math} + but by using another command.
+ This is a simple math expression without numbering + \[\sqrt{x^2+1}\] + separated from text.
+ This is also the same: + \begin{displaymath} + \sqrt{x^2+1} + \end{displaymath}
+ \ldots and this: + \begin{equation*} + \sqrt{x^2+1} + \end{equation*}
\begin{itemize} \item The individual entries are indicated with a black dot, a so-called bullet. \item The text in the entries may be of any length. \end{itemize}
\begin{enumerate} \item This is the first entry in our list. \item The list numbers increase with each entry we add. \end{enumerate}
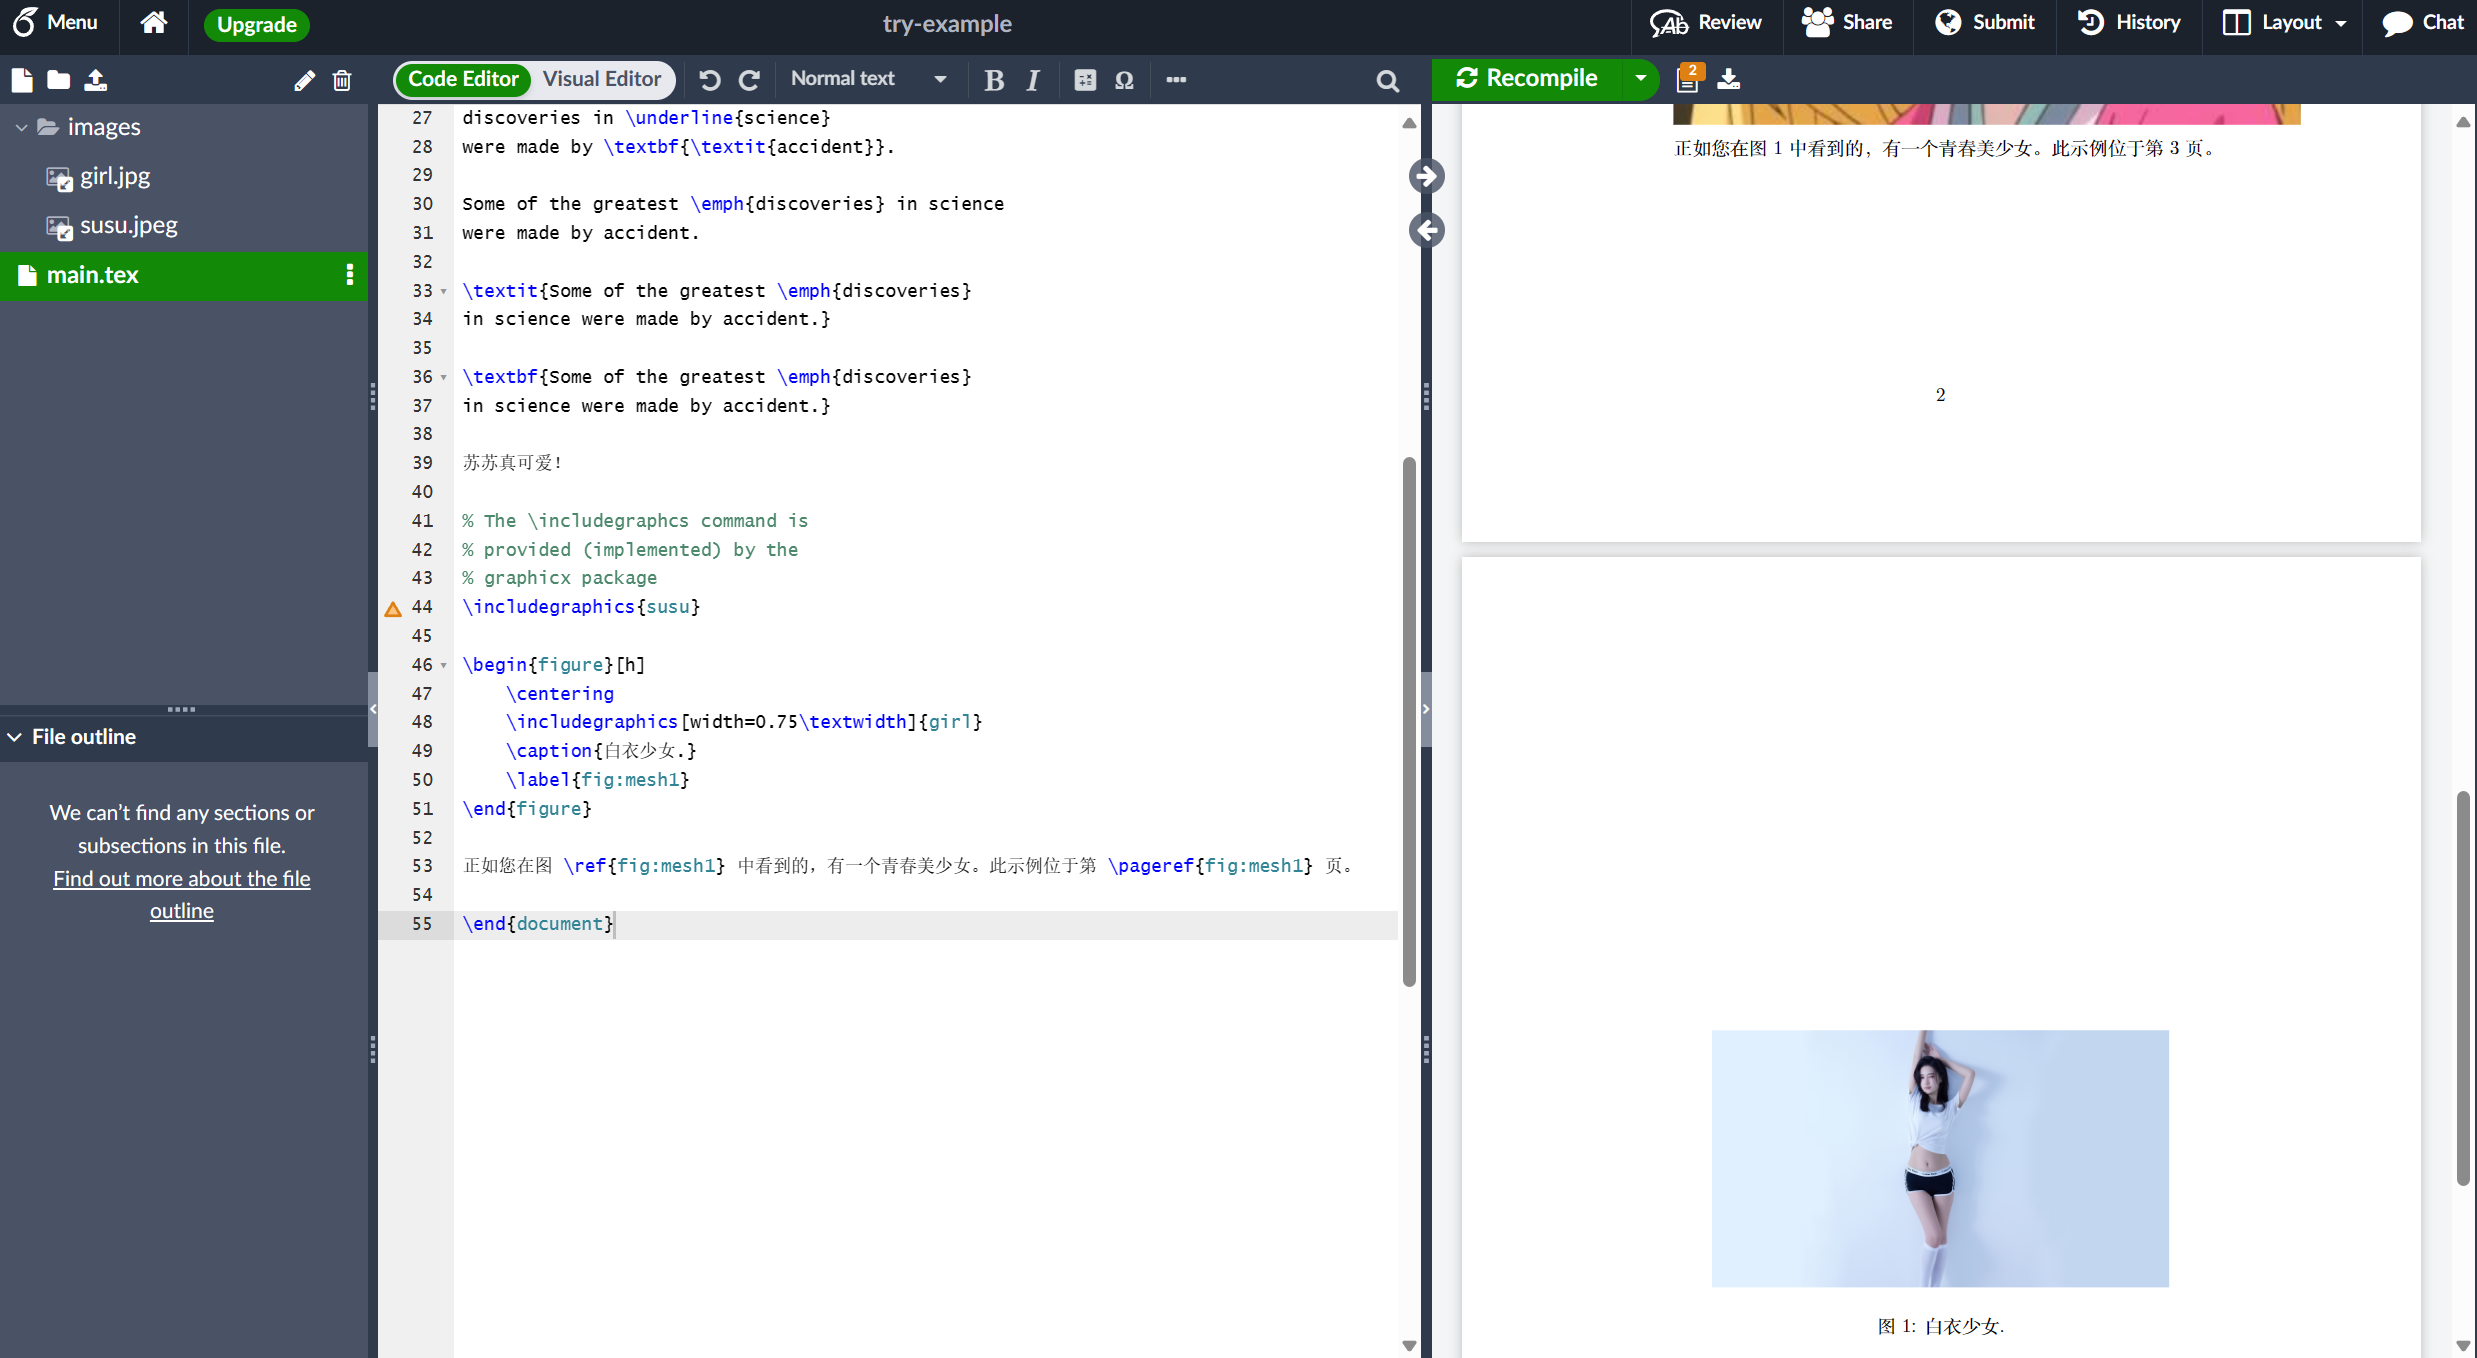
In physics, the mass-energy equivalence is stated by the equation $E=mc^2$, discovered in 1905 by Albert Einstein.
\begin{math} E=mc^2 \end{math} is typeset in a paragraph using inline math mode---as is $E=mc^2$, and so too is \(E=mc^2\).
The mass-energy equivalence is described by the famous equation \[ E=mc^2 \] discovered in 1905 by Albert Einstein.
In natural units ($c = 1$), the formula expresses the identity \begin{equation} E=m \end{equation}
Subscripts in math mode are written as $a_b$ and superscripts are written as $a^b$. These can be combined and nested to write expressions such as
\[ T^{i_1 i_2 \dots i_p}_{j_1 j_2 \dots j_q} = T(x^{i_1},\dots,x^{i_p},e_{j_1},\dots,e_{j_q}) \] We write integrals using $\int$ and fractions using $\frac{a}{b}$. Limits are placed on integrals using superscripts and subscripts:
\[ \int_0^1 \frac{dx}{e^x} = \frac{e-1}{e} \]
Lower case Greek letters are written as $\omega$ $\delta$ etc. while upper case Greek letters are written as $\Omega$ $\Delta$.
Mathematical operators are prefixed with a backslash as $\sin(\beta)$, $\cos(\alpha)$, $\log(x)$ etc.
\section{First example}
The well-known Pythagorean theorem \(x^2 + y^2 = z^2\) was proved to be invalid for other exponents, meaning the next equation has no integer solutions for \(n>2\):
\[ x^n + y^n = z^n \]
\section{Second example}
This is a simple math expression \(\sqrt{x^2+1}\) inside text. And this is also the same: \begin{math} \sqrt{x^2+1} \end{math} but by using another command.
This is a simple math expression without numbering \[\sqrt{x^2+1}\] separated from text.
This is also the same: \begin{displaymath} \sqrt{x^2+1} \end{displaymath}
\ldots and this: \begin{equation*} \sqrt{x^2+1} \end{equation*}
+ \begin{abstract} + This is a simple paragraph at the beginning of the + document. A brief introduction about the main subject. + \end{abstract}
\begin{itemize} \item The individual entries are indicated with a black dot, a so-called bullet. \item The text in the entries may be of any length. \end{itemize}
\begin{enumerate} \item This is the first entry in our list. \item The list numbers increase with each entry we add. \end{enumerate}
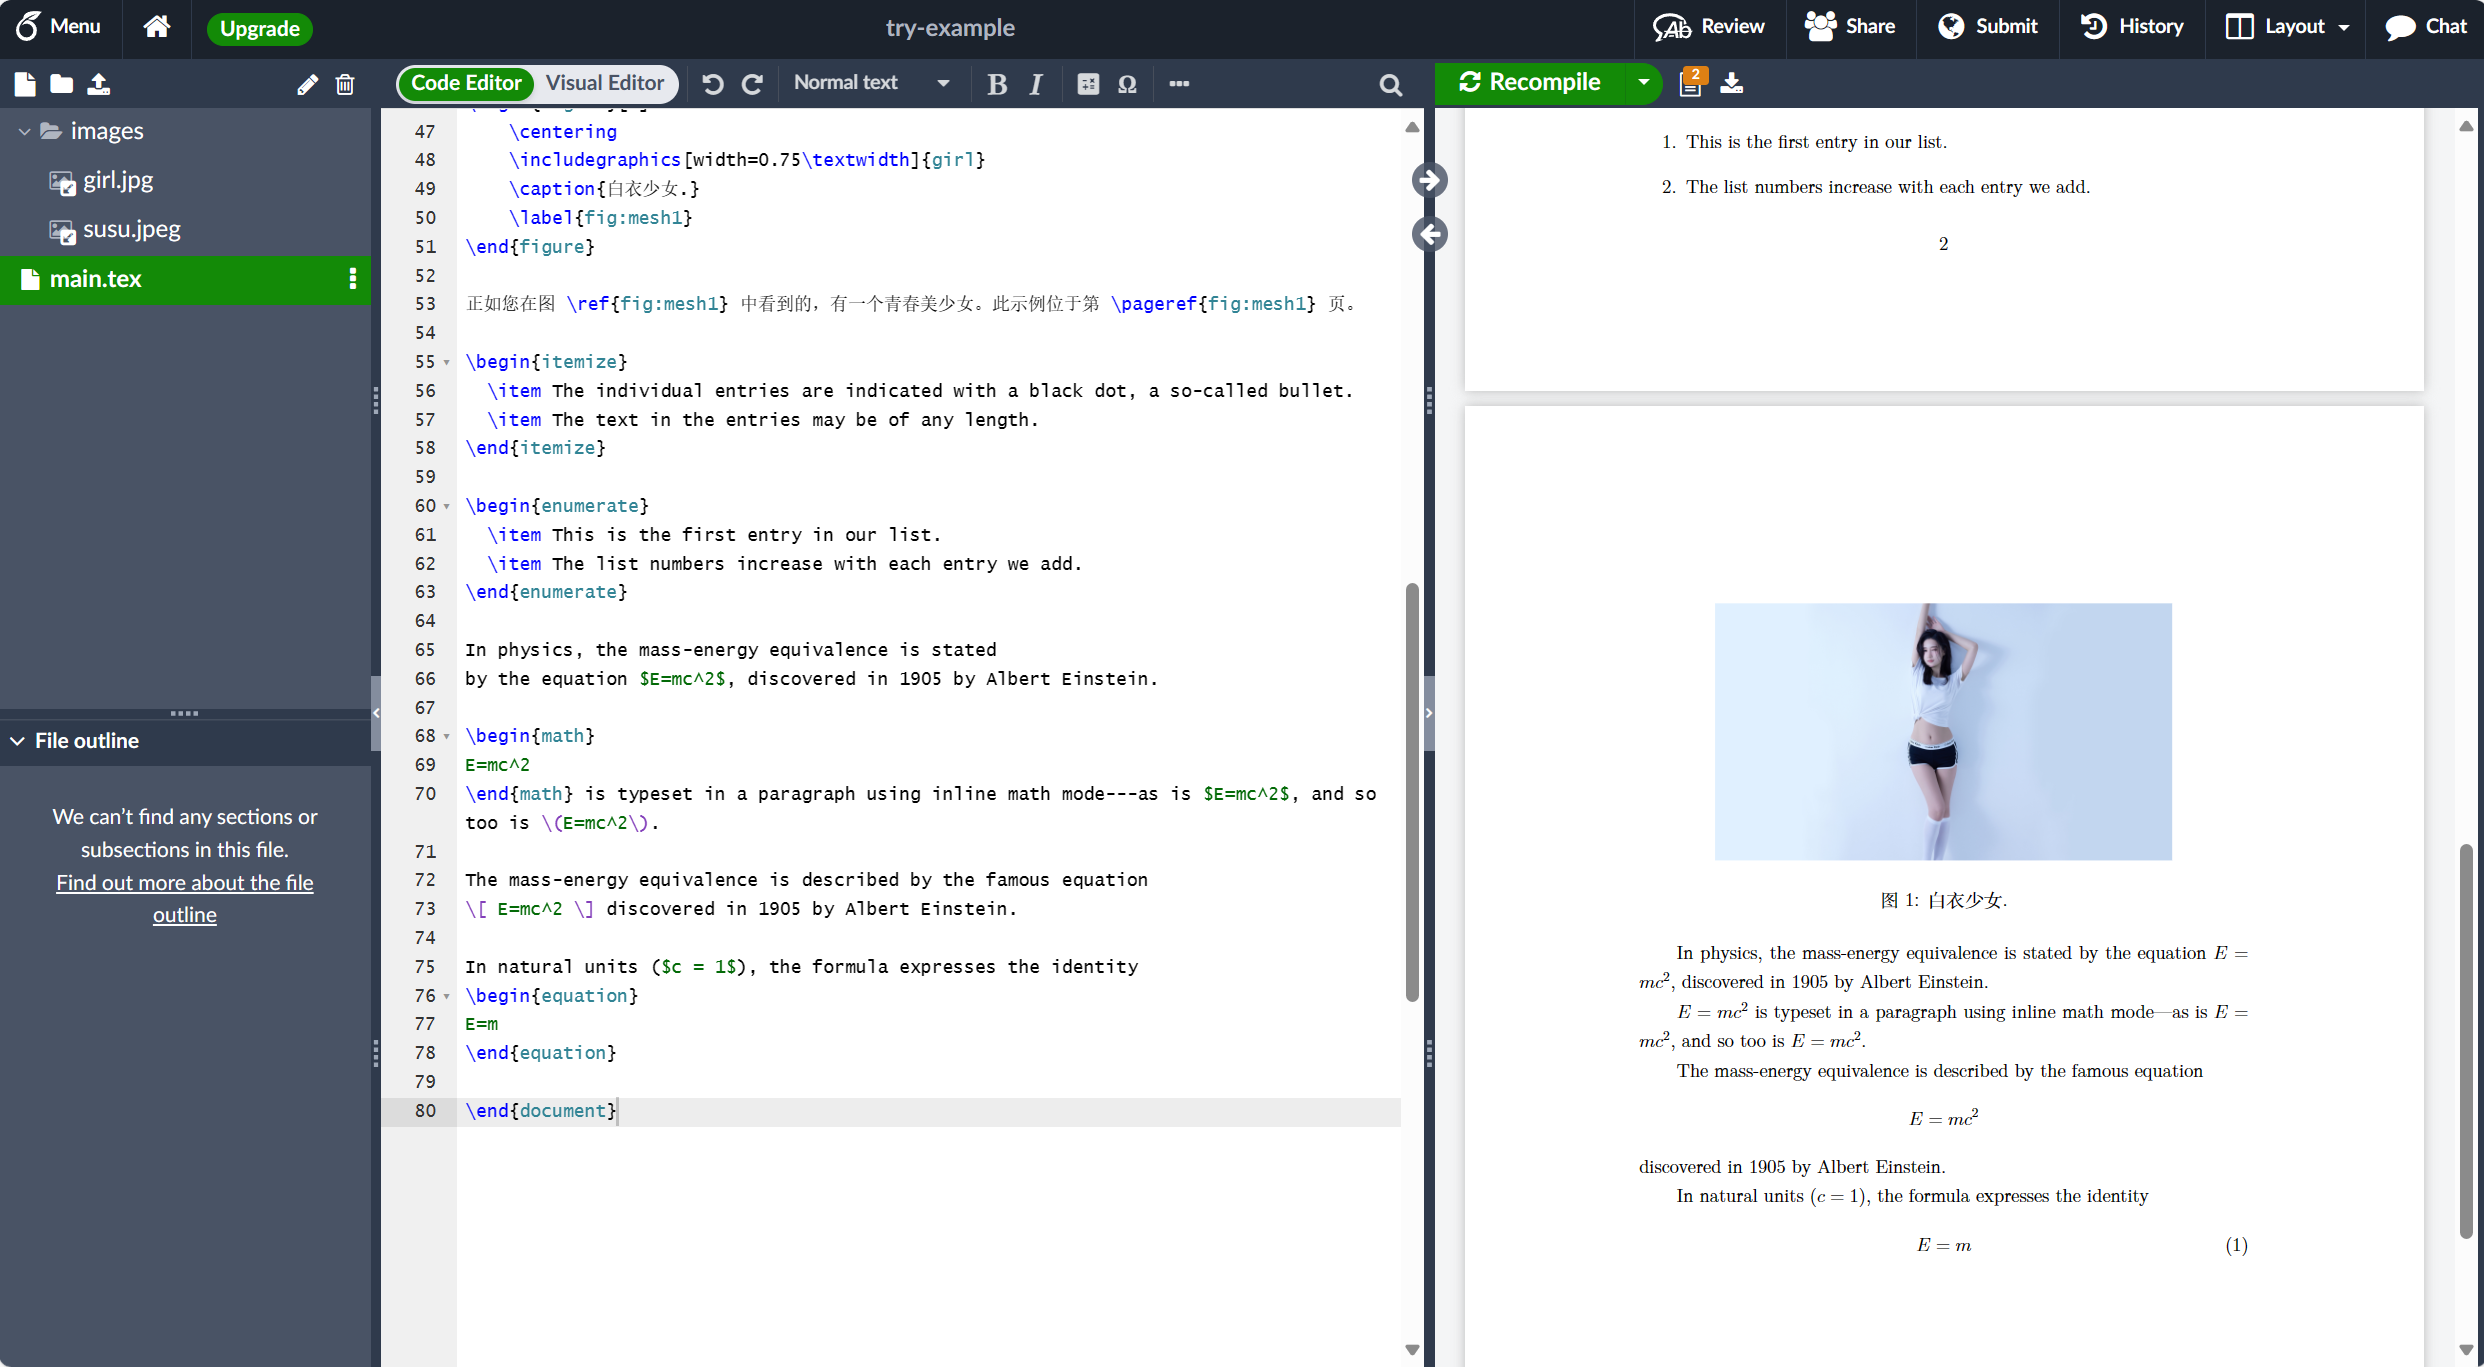
In physics, the mass-energy equivalence is stated by the equation $E=mc^2$, discovered in 1905 by Albert Einstein.
\begin{math} E=mc^2 \end{math} is typeset in a paragraph using inline math mode---as is $E=mc^2$, and so too is \(E=mc^2\).
The mass-energy equivalence is described by the famous equation \[ E=mc^2 \] discovered in 1905 by Albert Einstein.
In natural units ($c = 1$), the formula expresses the identity \begin{equation} E=m \end{equation}
Subscripts in math mode are written as $a_b$ and superscripts are written as $a^b$. These can be combined and nested to write expressions such as
\[ T^{i_1 i_2 \dots i_p}_{j_1 j_2 \dots j_q} = T(x^{i_1},\dots,x^{i_p},e_{j_1},\dots,e_{j_q}) \] We write integrals using $\int$ and fractions using $\frac{a}{b}$. Limits are placed on integrals using superscripts and subscripts:
\[ \int_0^1 \frac{dx}{e^x} = \frac{e-1}{e} \]
Lower case Greek letters are written as $\omega$ $\delta$ etc. while upper case Greek letters are written as $\Omega$ $\Delta$.
Mathematical operators are prefixed with a backslash as $\sin(\beta)$, $\cos(\alpha)$, $\log(x)$ etc.
\section{First example}
The well-known Pythagorean theorem \(x^2 + y^2 = z^2\) was proved to be invalid for other exponents, meaning the next equation has no integer solutions for \(n>2\):
\[ x^n + y^n = z^n \]
\section{Second example}
This is a simple math expression \(\sqrt{x^2+1}\) inside text. And this is also the same: \begin{math} \sqrt{x^2+1} \end{math} but by using another command.
This is a simple math expression without numbering \[\sqrt{x^2+1}\] separated from text.
This is also the same: \begin{displaymath} \sqrt{x^2+1} \end{displaymath}
\ldots and this: \begin{equation*} \sqrt{x^2+1} \end{equation*}
\begin{abstract} This is a simple paragraph at the beginning of the document. A brief introduction about the main subject. \end{abstract}
+ After our abstract we can begin the first paragraph, then press ``enter'' twice to start the second one.
+ This line will start a second paragraph.
+ I will start the third paragraph and then add \\ a manual line break which causes this text to start on a new line but remains part of the same paragraph. Alternatively, I can use the \verb|\newline|\newline command to start a new line, which is also part of the same paragraph.
Lorem ipsum dolor sit amet, consectetuer adipiscing elit. Etiam lobortisfacilisis sem. Nullam nec mi et neque pharetra sollicitudin. Praesent imperdietmi nec ante. Donec ullamcorper, felis non sodales...
\section{Second Section}
Lorem ipsum dolor sit amet, consectetuer adipiscing elit. Etiam lobortis facilisissem. Nullam nec mi et neque pharetra sollicitudin. Praesent imperdiet mi necante...
\subsection{First Subsection} Praesent imperdietmi nec ante. Donec ullamcorper, felis non sodales...
\section*{Unnumbered Section} Lorem ipsum dolor sit amet, consectetuer adipiscing elit. Etiam lobortis facilisissem... \end{document}
Lorem ipsum dolor sit amet, consectetuer adipiscing elit. Etiam lobortisfacilisis sem. Nullam nec mi et neque pharetra sollicitudin. Praesent imperdietmi nec ante. Donec ullamcorper, felis non sodales...
\section{Second Section}
Lorem ipsum dolor sit amet, consectetuer adipiscing elit. Etiam lobortis facilisissem. Nullam nec mi et neque pharetra sollicitudin. Praesent imperdiet mi necante...
\subsection{First Subsection} Praesent imperdietmi nec ante. Donec ullamcorper, felis non sodales...
\section*{Unnumbered Section} Lorem ipsum dolor sit amet, consectetuer adipiscing elit. Etiam lobortis facilisissem...
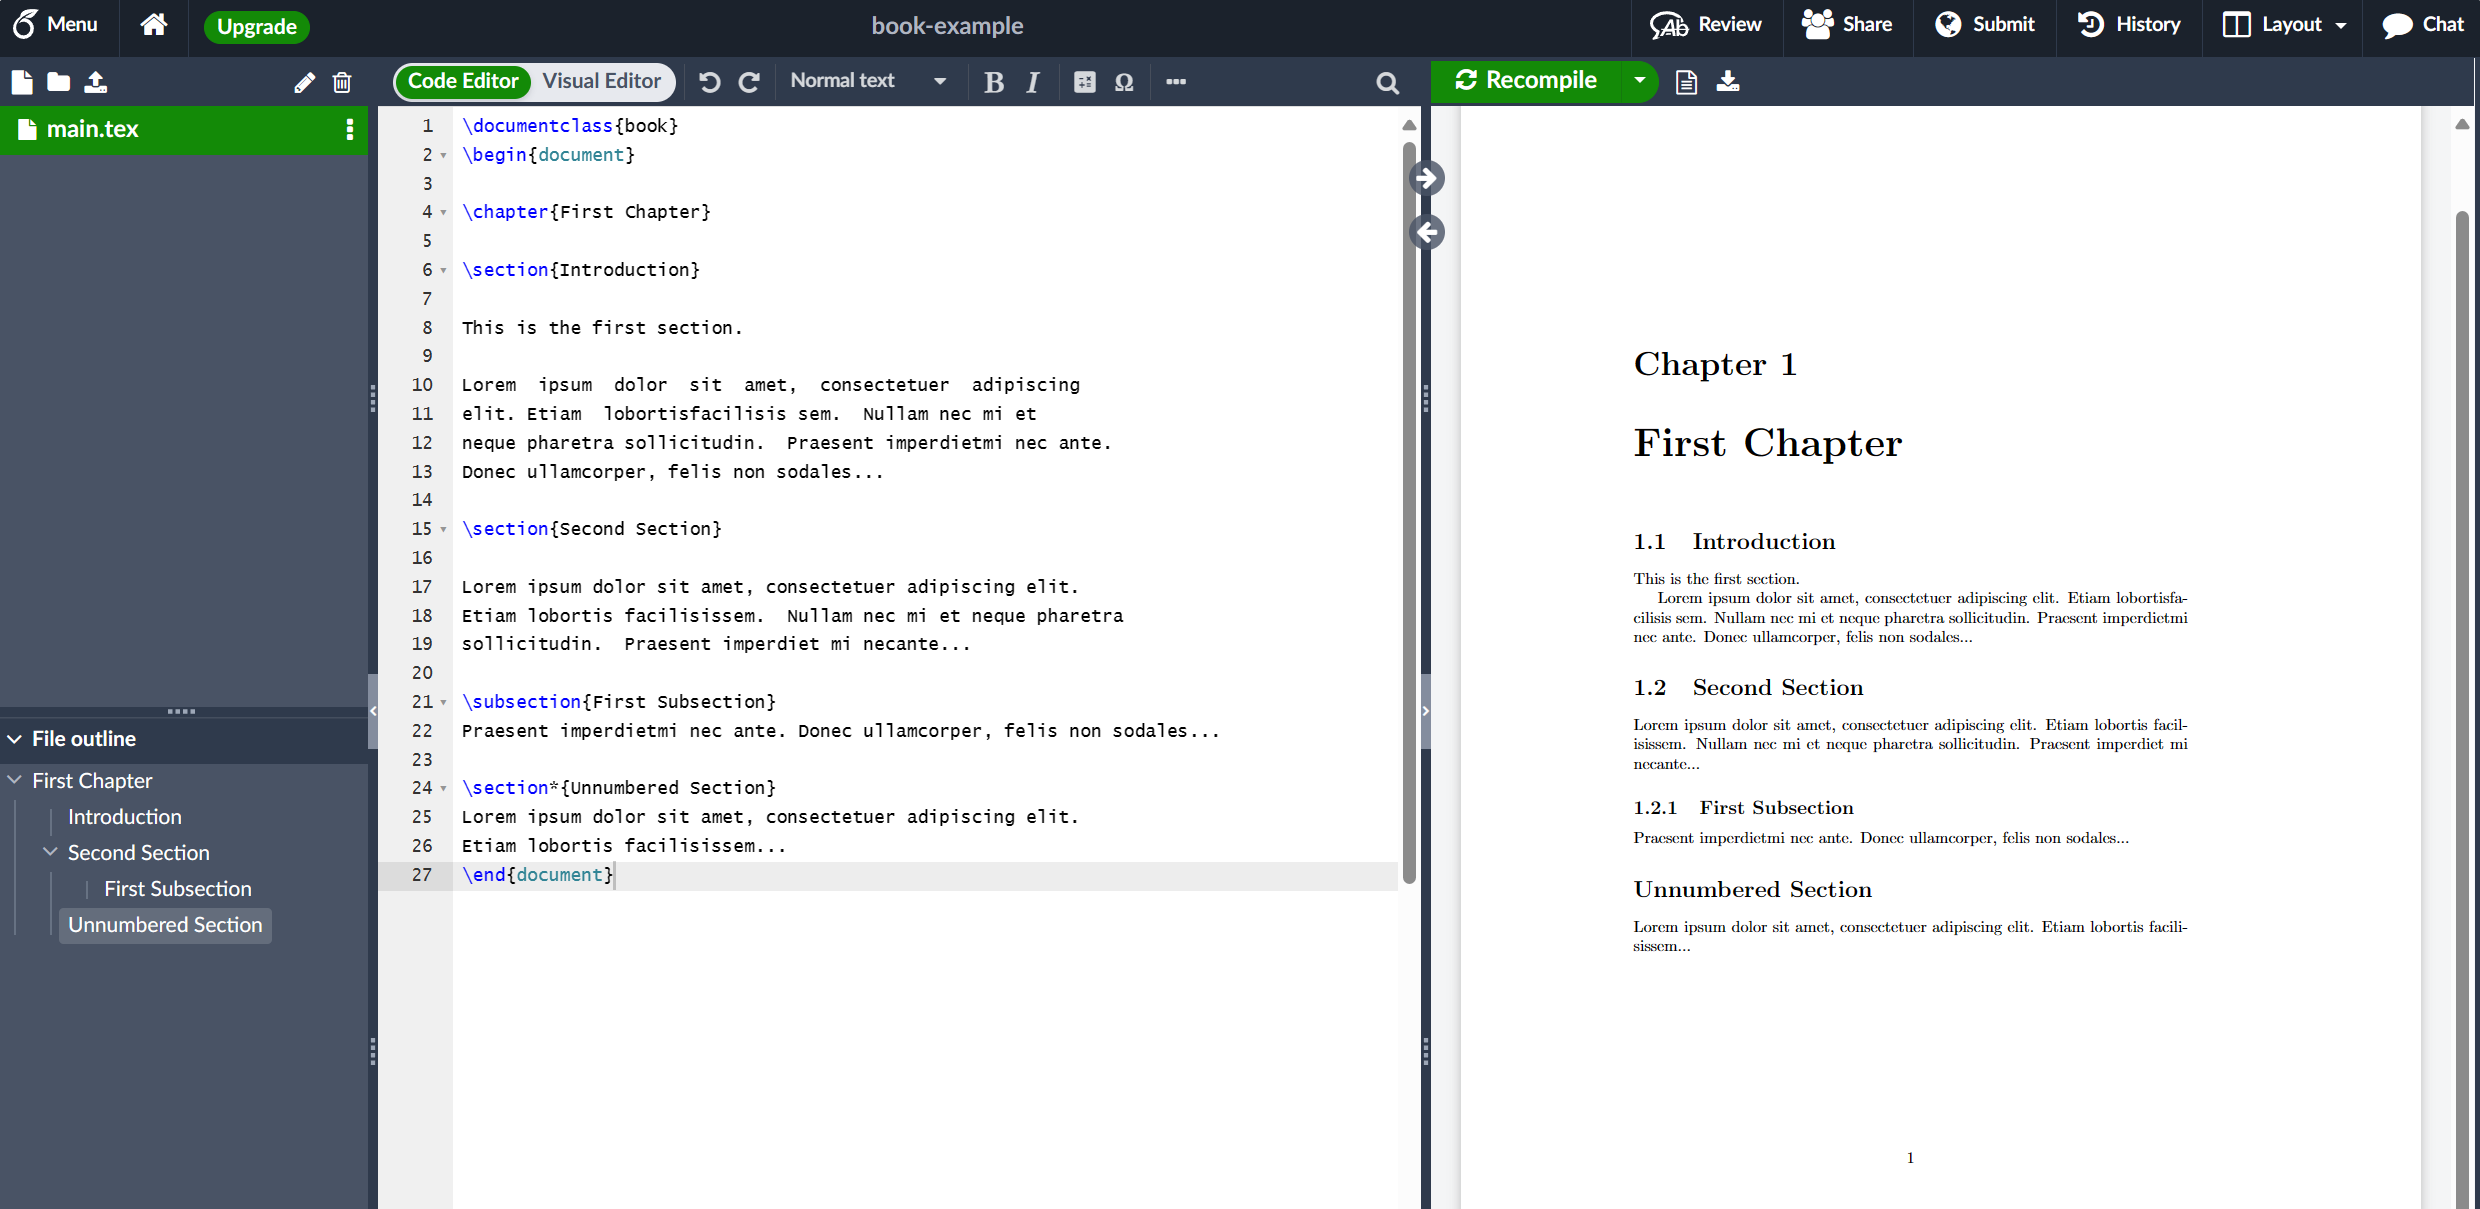
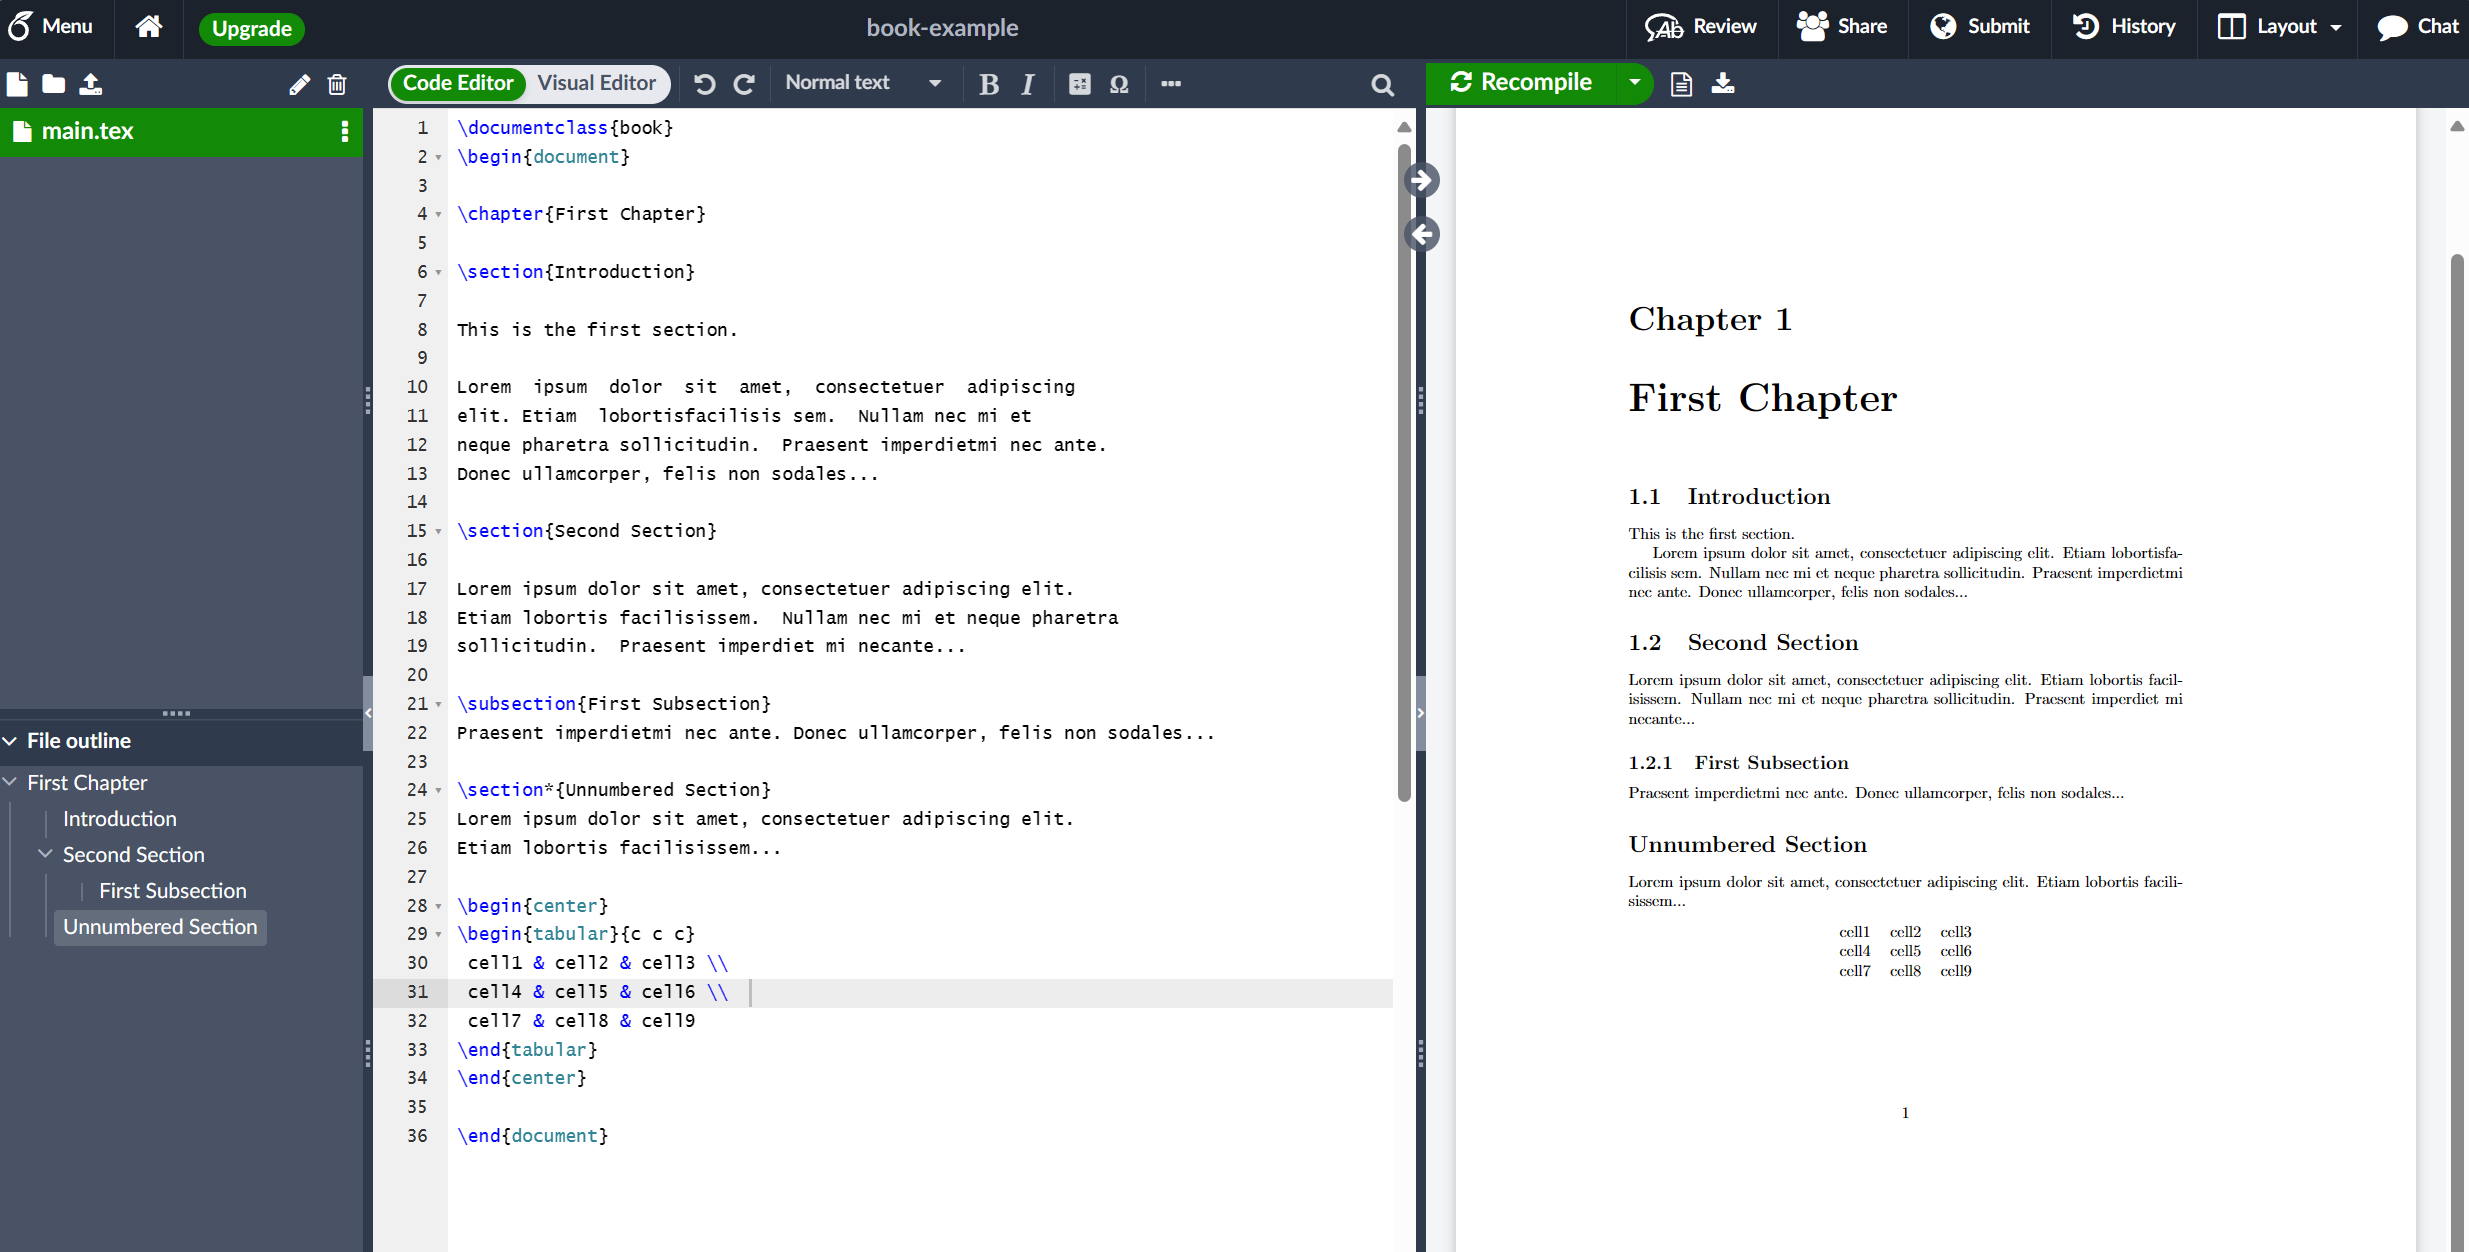
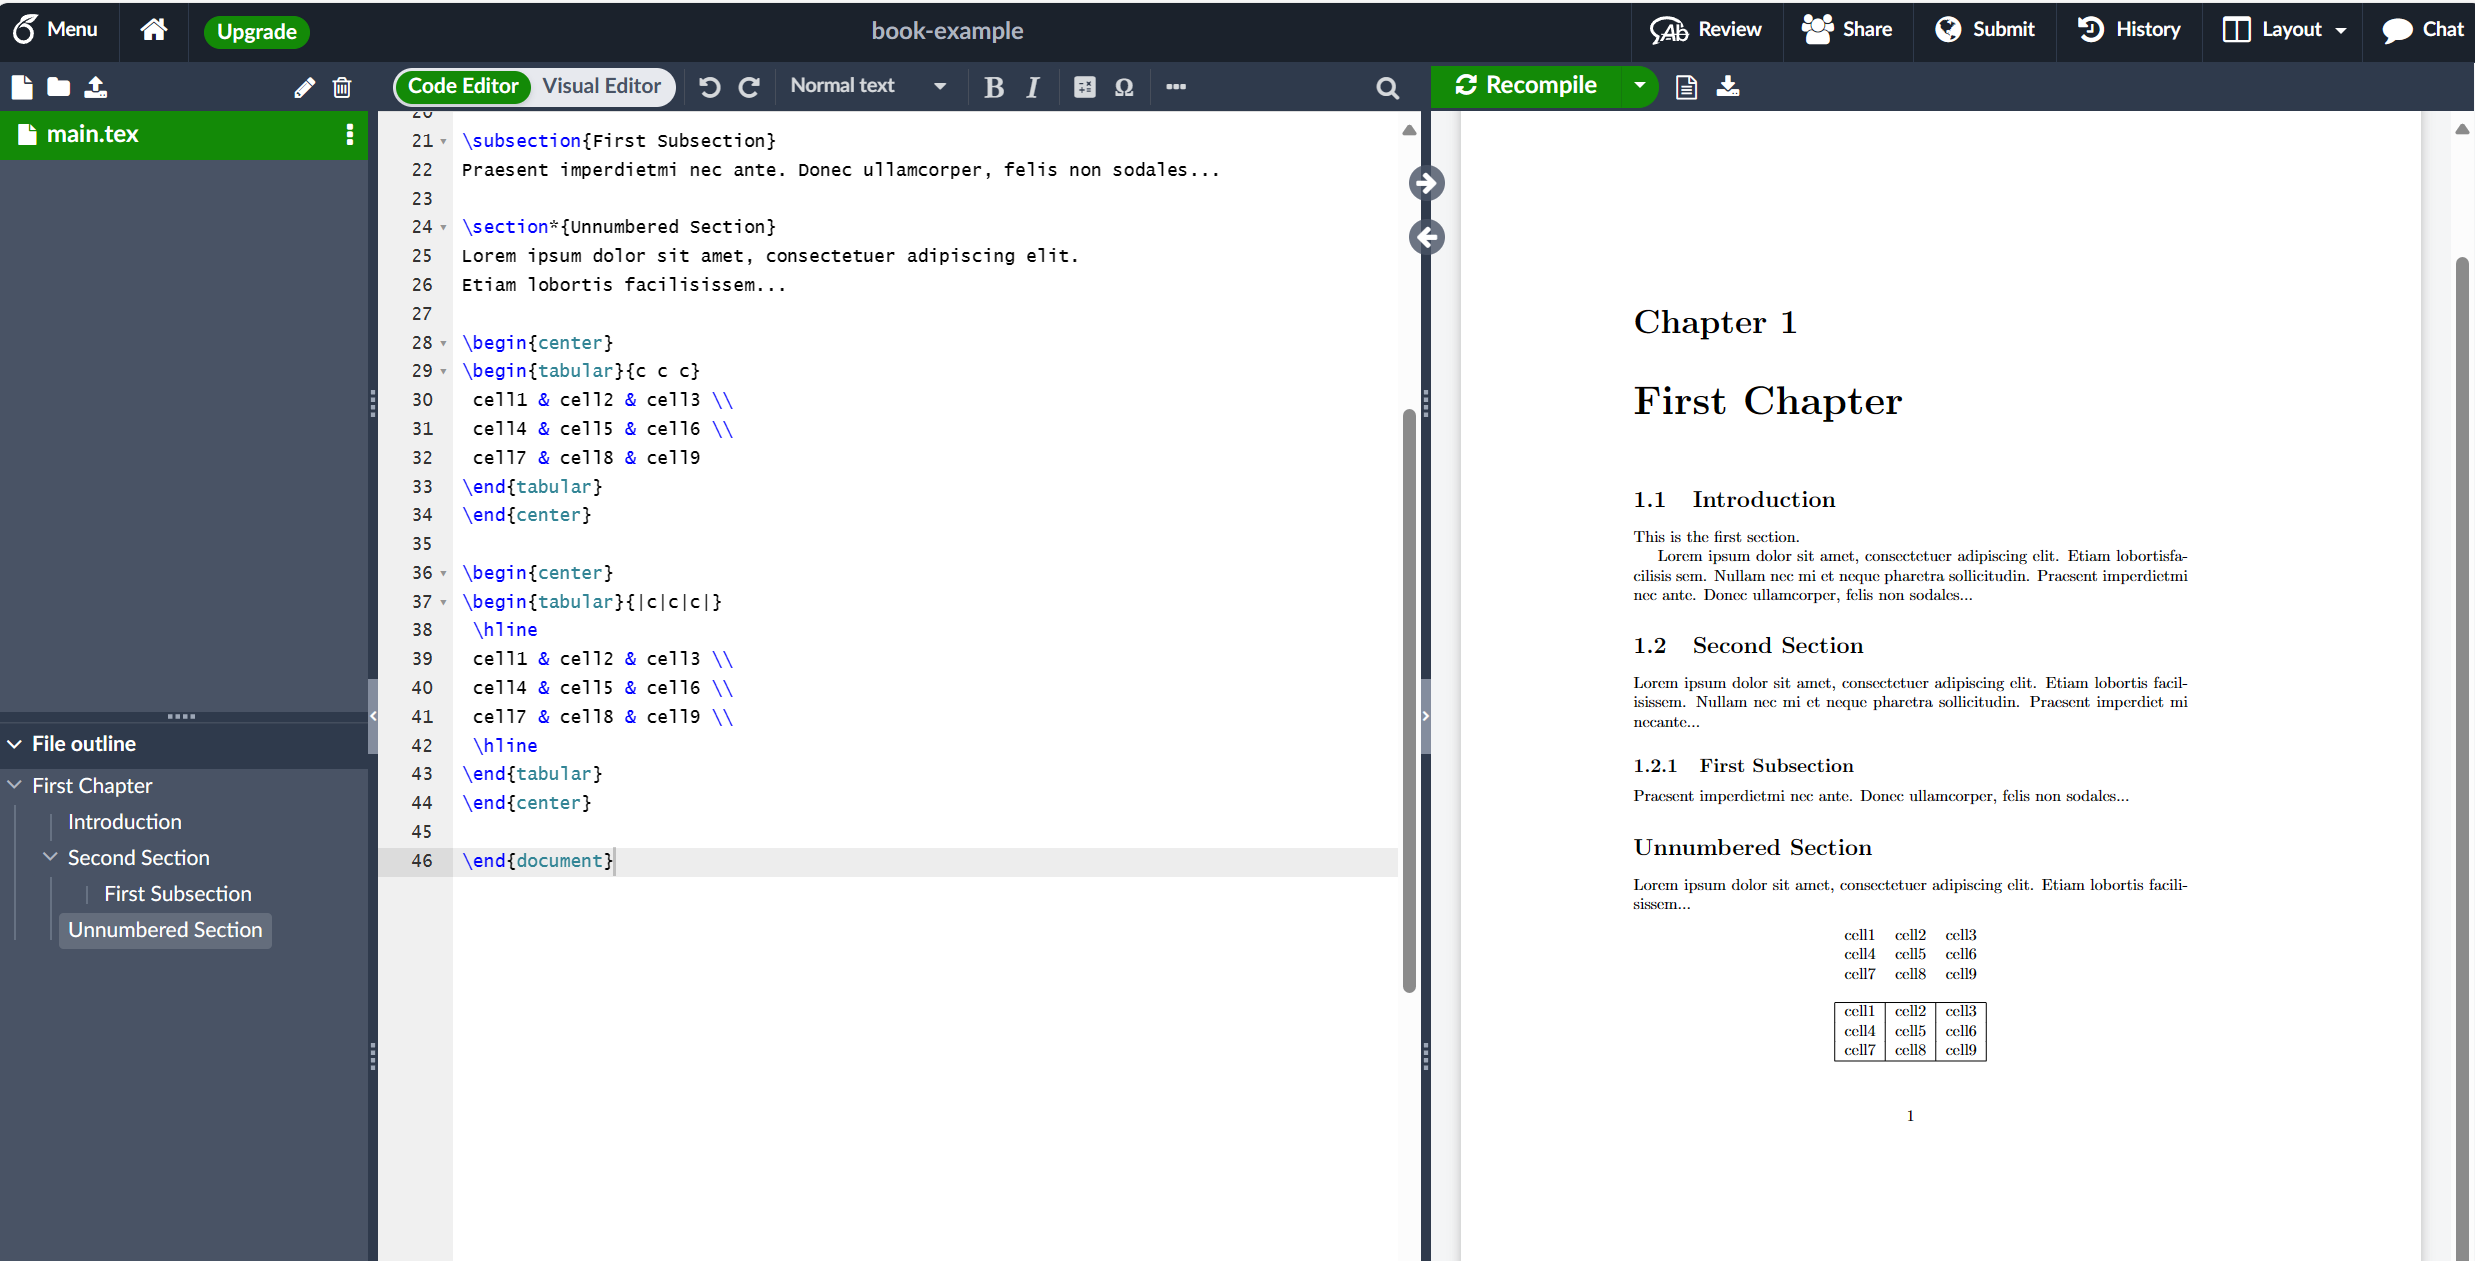
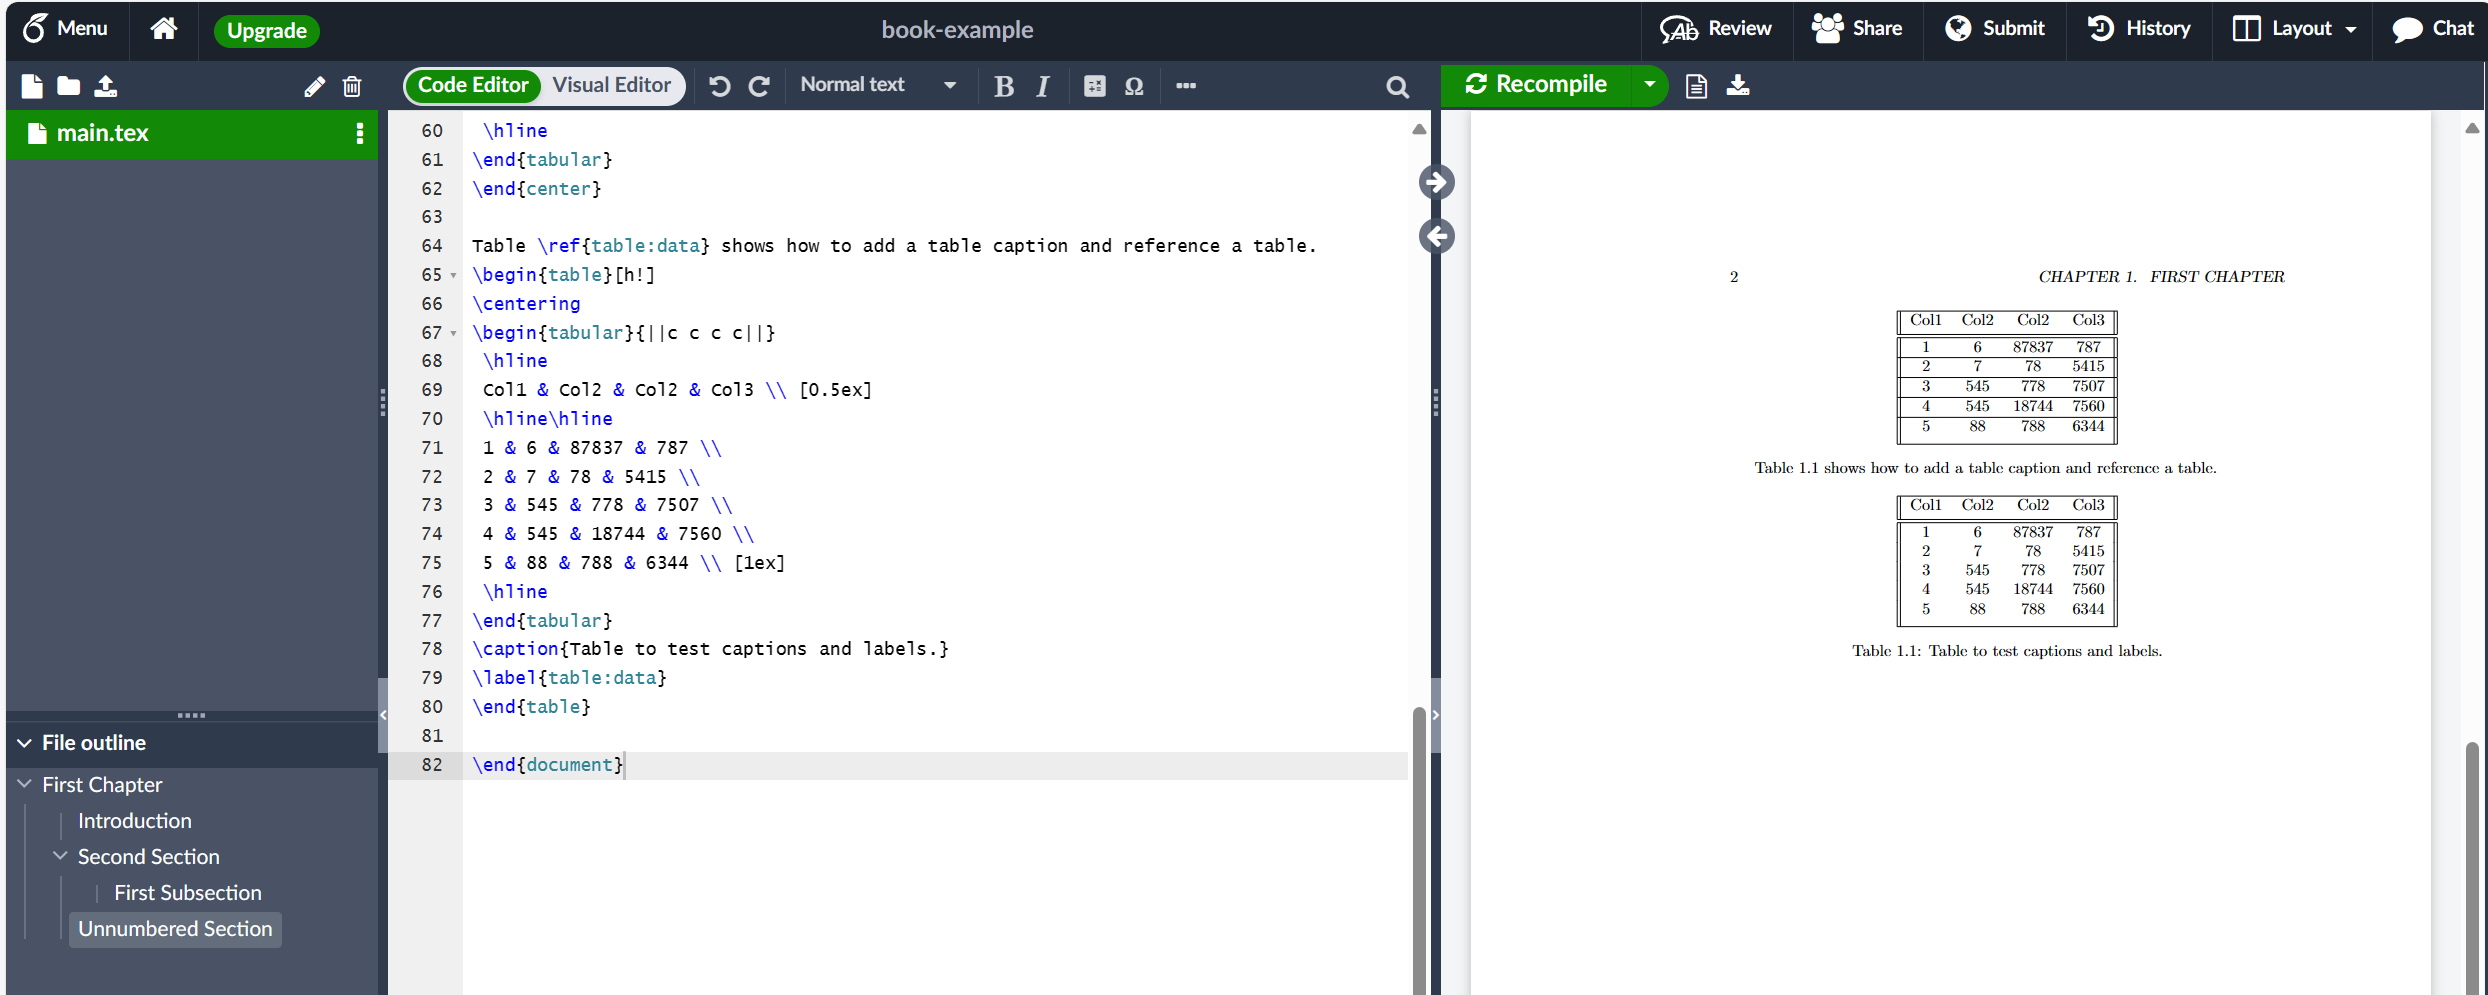
tabular 环境是创建表的默认 LaTeX 方法。您必须为此环境指定一个参数,在这种情况下 {c c c} 它建议 LaTeX 将有三列,并且每列中的文本必须居中。您还可以使用 r 对文本进行右对齐,使用 l 对文本进行左对齐。对齐符号 & 用于标定表格行内的单个表格单元格。要结束表行,请使用新的行命令 \\ 。我们的表格包含在 center 环境中,使其在页面的文本宽度内居中。
Lorem ipsum dolor sit amet, consectetuer adipiscing elit. Etiam lobortisfacilisis sem. Nullam nec mi et neque pharetra sollicitudin. Praesent imperdietmi nec ante. Donec ullamcorper, felis non sodales...
\section{Second Section}
Lorem ipsum dolor sit amet, consectetuer adipiscing elit. Etiam lobortis facilisissem. Nullam nec mi et neque pharetra sollicitudin. Praesent imperdiet mi necante...
\subsection{First Subsection} Praesent imperdietmi nec ante. Donec ullamcorper, felis non sodales...
\section*{Unnumbered Section} Lorem ipsum dolor sit amet, consectetuer adipiscing elit. Etiam lobortis facilisissem...
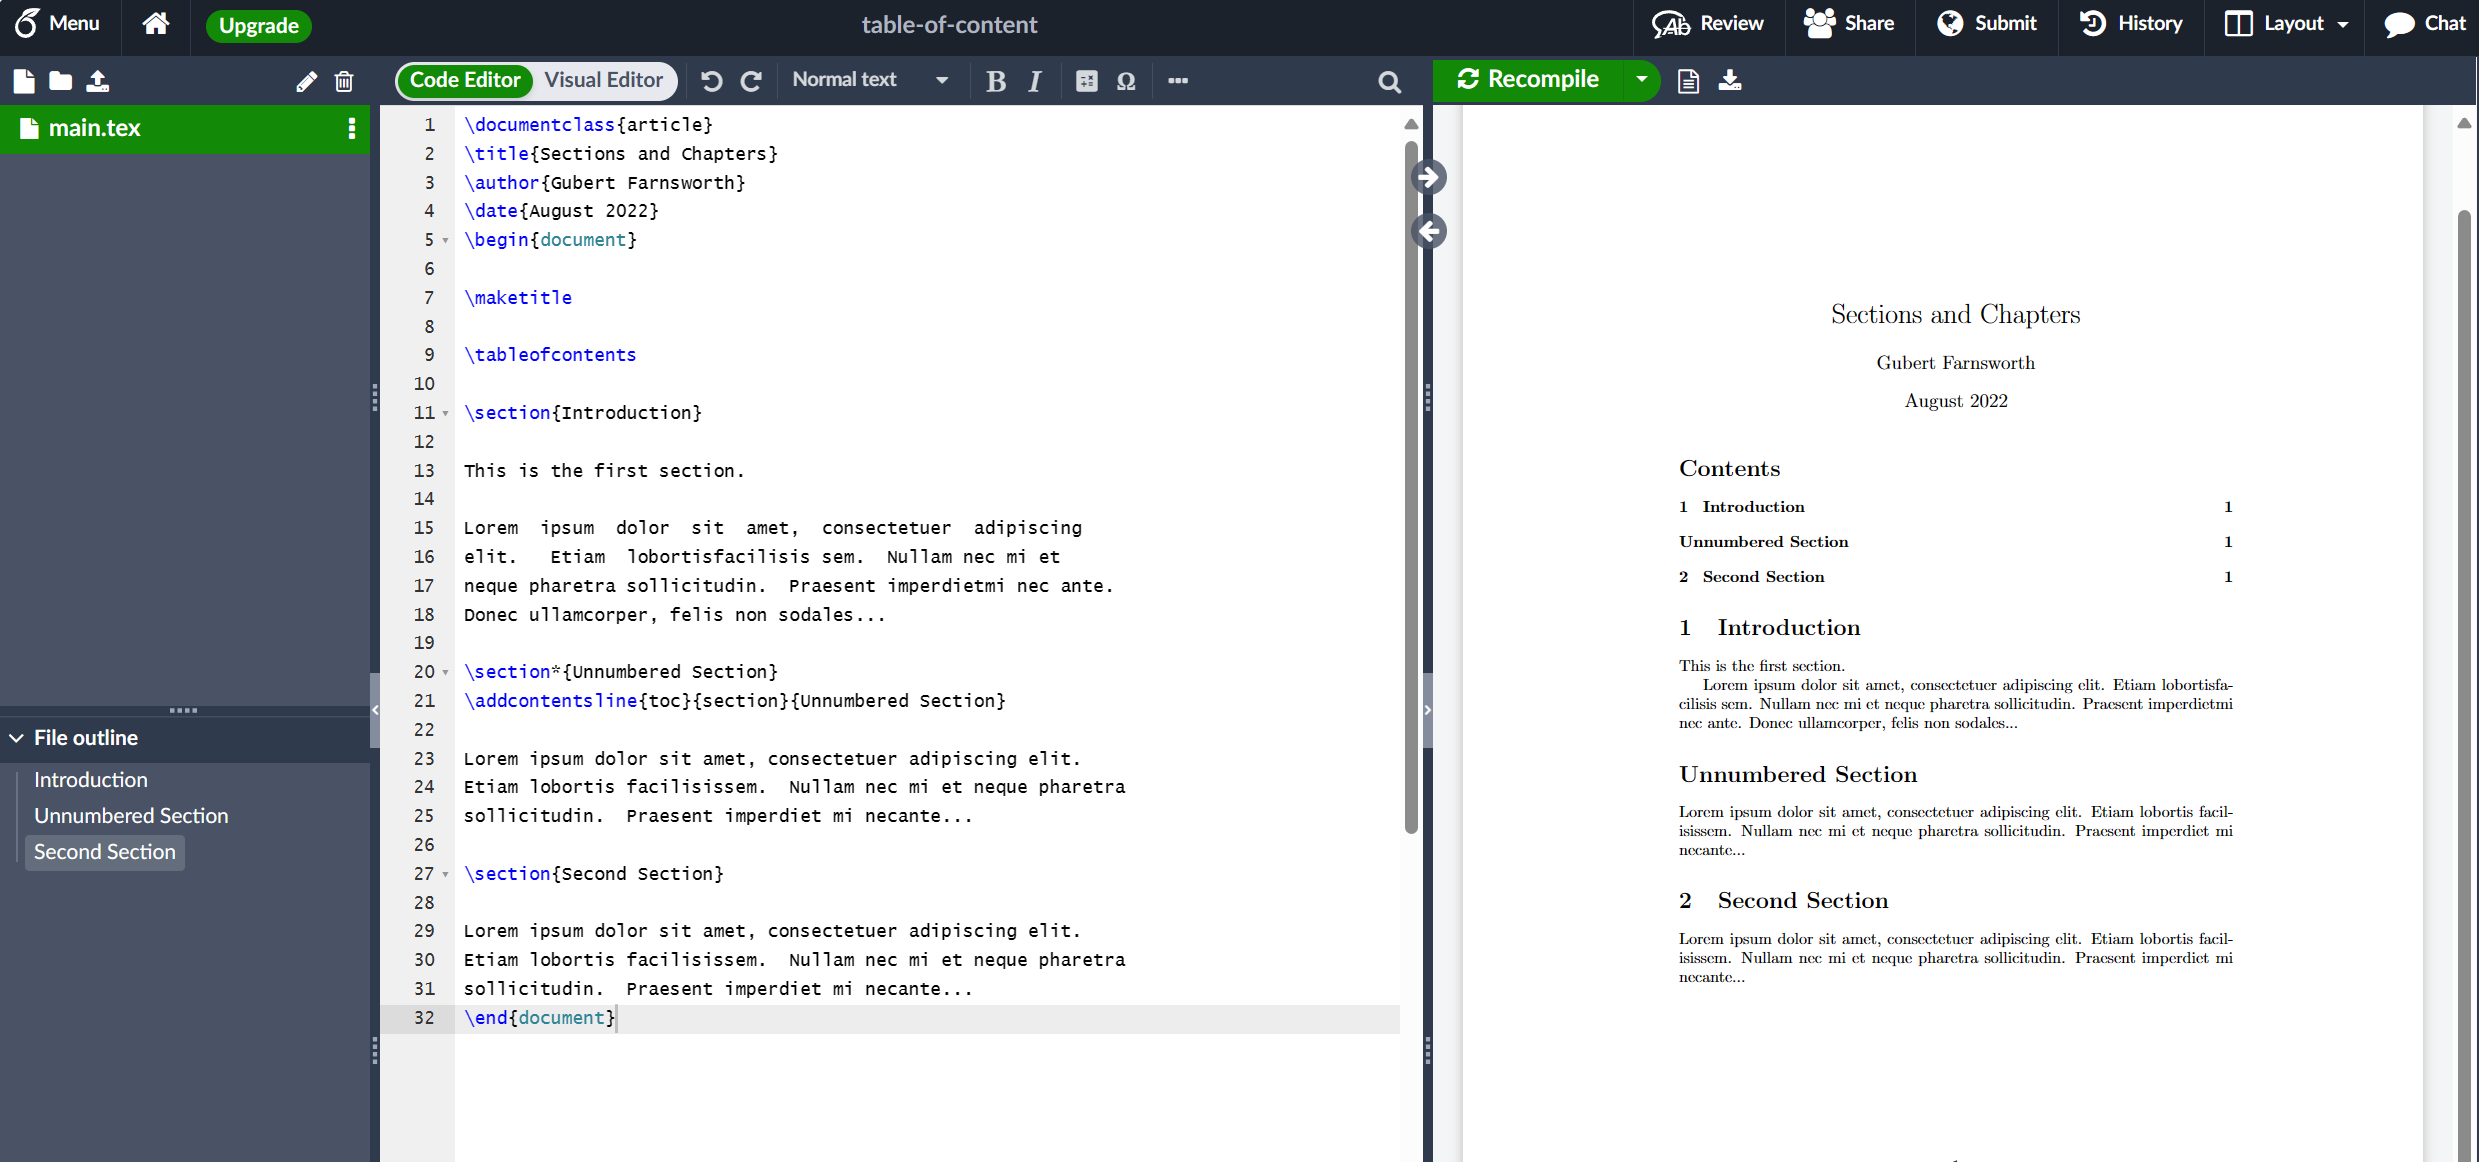
\section{Introduction} This is the first section. Lorem ipsum dolor sit amet, consectetuer adipiscing elit. Etiam lobortisfacilisis sem. Nullam nec mi et neque pharetra sollicitudin. Praesent imperdietmi nec ante. Donec ullamcorper, felis non sodales... \section*{Unnumbered Section} \addcontentsline{toc}{section}{Unnumbered Section}
Lorem ipsum dolor sit amet, consectetuer adipiscing elit. Etiam lobortis facilisissem. Nullam nec mi et neque pharetra sollicitudin. Praesent imperdiet mi necante...
\section{Second Section} Lorem ipsum dolor sit amet, consectetuer adipiscing elit. Etiam lobortis facilisissem. Nullam nec mi et neque pharetra sollicitudin. Praesent imperdiet mi necante... \end{document}
每年一次,托管在 CTAN 上的(大量)软件包子集,以及与 LaTeX 相关的字体和其他软件,作为一个名为 TeX Live 的系统进行整理和分发,该系统可用于安装您自己的(本地)LaTeX 设置。事实上,Overleaf 的服务器也使用 TeX Live,并在新版本的 TeX Live 发布时进行更新。Overleaf 的 TeX Live 更新不是即时的,而是在发布后几个月进行的,这让我们有时间对新的 TeX Live 版本与我们图库中包含的数千个模板进行兼容性测试。
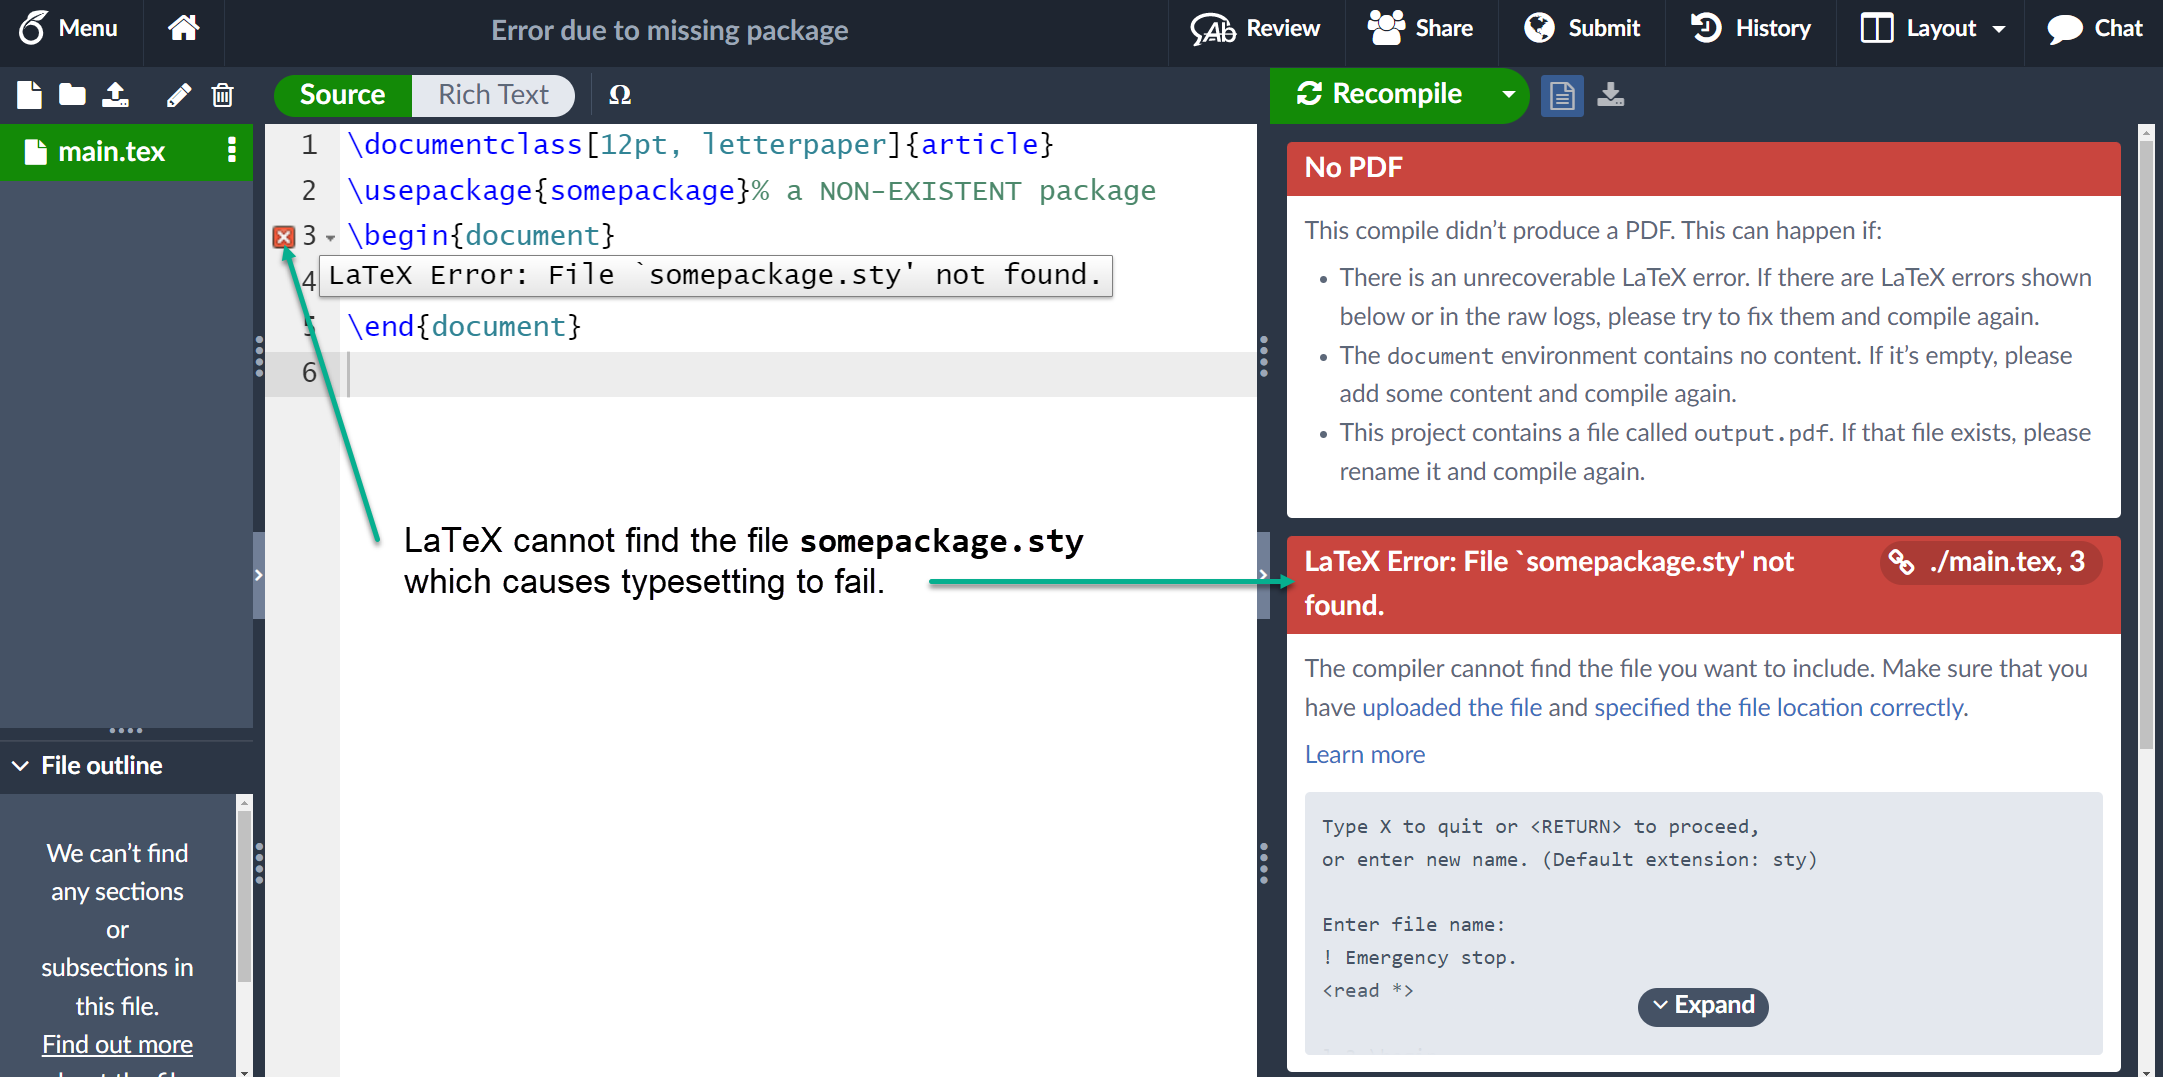
虽然 TeX Live 包含 CTAN 包的(大)子集,但可以找到一个有趣的包,例如用于排版 Go 图表的 igo,它托管在 CTAN 上,但不包含在(由) TeX Live 中,因此在 Overleaf 上不可用。由于各种原因,CTAN 上托管的一些包不是 TeX Live 的一部分:可能一个包已经过时,有许可问题,非常新(最近上传)或具有平台依赖关系,例如在 Windows 上工作但在 Linux 不工作。
新软件包和对现有软件包的更新全年都上传到 CTAN,但 TeX Live 的更新一年一次地分发;因此,TeX Live 当前版本中包含的软件包不会像 CTAN 上托管的软件包那样最新。因为 Overleaf 的服务器使用 TeX Live,所以安装在 Overleaf 服务器上的软件包——即 Overleaf 用户可以使用的软件包——可能不是 CTAN 上可用的最新版本,但一般来说,这不太可能有问题。


 wechat
 alipay